



Water in a crawl space doesn't announce itself. A burst supply line, a failed sump pump, or a heavy rain can soak joists, subfloor panels, and insulation hours before you smell anything upstairs. To dry out a crawl space the right way, work in order: stop the source, pump out standing water, clear wet materials, then run a dehumidifier with controlled airflow.
A floor that looks clear is not the finish line; wood holds moisture deep in the framing long after the surface feels dry, and that's exactly where mold and rot start. The EPA puts the mold growth window at 24 to 48 hours in damp conditions. Every hour counts. Today’s guide covers how to dry out a crawl space quickly, step by step, and when to call a professional.
Quick Action Checklist
● Stop the leak or water entry
● Shut off unsafe electrical circuits
● Pump out standing water
● Remove wet insulation and debris
● Cover or isolate ground moisture
● Run a dehumidifier and controlled airflow
● Measure RH (relative humidity) and wood moisture content daily
Before You Start: Is the Crawl Space Safe to Enter?
A wet crawl space hides dangers more urgent than the water itself. Run through these checks before going in.
Check for Electrical and Structural Hazards
Water and live circuits are life-threatening. If water is near outlets, wiring, or HVAC equipment, cut the breaker for that zone first. Not sure which circuits serve the space? Kill the main until an electrician clears it.
From the access opening, push on the subfloor and look for soft spots or shifted joists. Warped or darkened wood signals deterioration. Don't put weight on framing you're not confident is solid. Gas, chemical, or sewage odors mean leave immediately and ventilate before re-entering.
Identify the Type of Water
● Clean water from a broken supply line is safe to address yourself once the source is shut off.
● Rainwater and groundwater carry low-level contaminants but are generally manageable with proper protective gear.
● Sewage or contaminated floodwater needs a professional. Don't enter, don't run fans, don't attempt DIY drying.
Check for Existing Mold
Fuzzy growth or unexplained dark staining on joists changes how the area should be handled. Do not aim ordinary household fans directly at affected materials, because uncontrolled airflow may spread spores. A dehumidifier can help control moisture, but it cannot remove existing growth; its role in mold control is only one part of containment, cleanup, and controlled drying.
Safety Decision Table
|
Condition |
DIY Drying May Be Reasonable |
Call a Professional |
|
Small clean-water leak, quickly stopped |
Yes |
Optional |
|
Shallow rainwater, safe access |
Yes |
Optional |
|
Deep or repetitive standing water |
No |
Yes |
|
Sewage or polluted floodwater |
No |
Yes |
|
Water near electrical equipment |
No |
Yes |
|
Visible widespread mold |
No |
Yes |
|
Soft, sagging, or rotted wood |
No |
Yes |
|
Very low or unsafe access |
No |
Yes |
Find and Stop the Water Source
No amount of drying equipment can keep up with an active water source. Before bringing in fans or a dehumidifier, confirm where the water is coming from and cut it off. The table below matches what you see to the most likely cause and the appropriate first action.
|
What You See |
Likely Source |
First Action |
|
Water pooled below a pipe |
Plumbing leak |
Shut off supply and repair |
|
Water appears after rain |
Gutters, grading, or foundation seepage |
Redirect exterior water |
|
Water enters at wall-floor joint |
Groundwater or hydrostatic pressure |
Evaluate drainage and sump pump |
|
Damp soil without puddles |
Ground vapor |
Add or repair vapor barrier |
|
Condensation on ducts or pipes |
Humid air on cold surfaces |
Insulate, air-seal, dehumidify |
|
Sump pit overflowing |
Pump or discharge failure |
Repair pump or drain line |
Do Not Start Permanent Repairs Until the Source Is Confirmed
A broken pipe needs a plumber. Seasonal groundwater needs drainage and a vapor barrier. Confirm the cause first; the wrong fix leaves the water source open.
How to Dry Out a Crawl Space Step by Step
Work in order. Running drying equipment before the water is out wastes runtime and stresses the equipment.

Step 1: Stop Active Water Entry
Shut off leaking supply lines and redirect surface runoff away from the foundation as a temporary measure. Serious groundwater problems may need a submersible pump running while permanent drainage is arranged.
Step 2: Remove Standing Water
Use a submersible or utility pump for volume. A wet/dry vacuum gets shallow puddles a pump can't reach. The dehumidifier comes after; it pulls moisture from the air, not water off the floor.
Step 3: Remove Wet Debris and Damaged Insulation
Clear everything saturated: trash, stored items, wet fiberglass batt insulation. Batt insulation holds water against the joists above and rarely dries fully in place. Clear saturated debris, stored items, and wet fiberglass batt insulation. Before setting up drying equipment, clean out the crawl space so airflow can reach the joists, subfloor, and other materials that will remain in place.
Step 4: Expose Wet Structural Surfaces
Inspect joists, beams, rim joists, and the subfloor underside for wet or discolored areas once debris is out. Reposition anything blocking airflow from reaching those surfaces directly. Don't remove structural framing without knowing what it supports.
Step 5: Control Ground Moisture
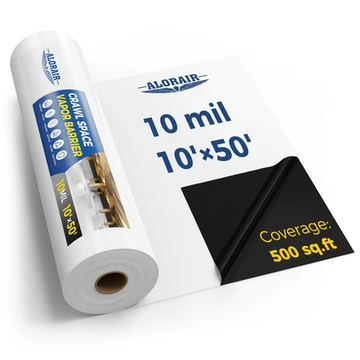
Bare soil releases moisture vapor constantly after visible water is gone. Once bulk water is pumped out, cover the soil with a vapor barrier. Don't cover active pooling; wait until the ground surface is actively drying.
Dirt Floor vs. Concrete Floor: How the Surface Type Changes the Approach
A dirt floor needs a vapor barrier as part of drying, not as a later upgrade. Without it, the dehumidifier fights constant ground evaporation and run times stretch significantly.
A concrete slab absorbs flood water and releases it slowly over days. Direct air movers across the surface. The slab can feel dry while still putting moisture into the air.
Step 6: Run a Dehumidifier and Controlled Airflow
Each piece of equipment has one job.
● A dehumidifier removes moisture from the air, the only equipment that actually extracts it from the space.
● Air movers increase evaporation from wet surfaces, giving the dehumidifier more to capture. Fans alone move humid air without removing it.
● Outdoor ventilation only helps when outside air is genuinely drier than the crawl space; in warm or humid months, open vents often pull more moisture in.
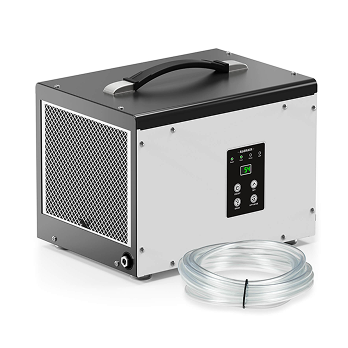
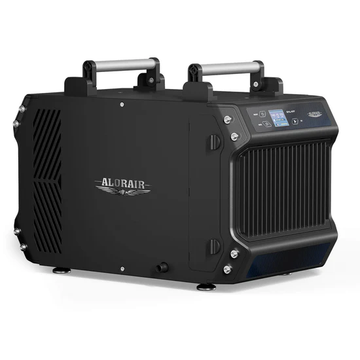
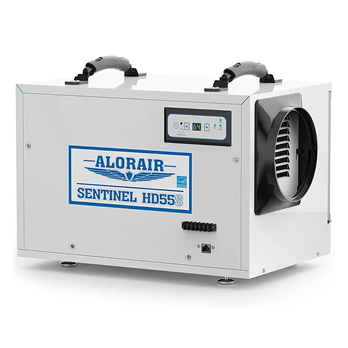
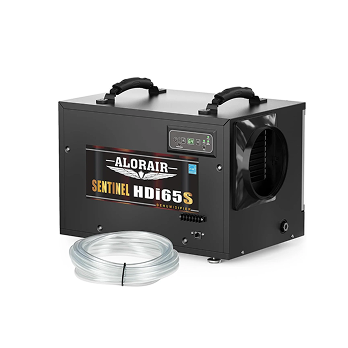
For overnight operation, the unit needs to drain continuously. A full collection tank stops drying completely. The Sentinel HD55P (120 PPD, up to 1,300 sq.ft.) and Galaxy 60P (145 PPD, up to 1,800 sq.ft.) both run with built-in condensate pumps that push water through a drain line without interruption, no manual emptying, no interrupted cycles. The full AlorAir crawl space dehumidifier lineup covers spaces from 1,000 to 3,300 sq.ft.
Drying time depends on the size of the crawl space, the moisture load, the materials affected, and whether the water source has been fully corrected. These same conditions determine how long a crawl space dehumidifier may need to run.
Step 7: Monitor Until Materials Are Dry
Record RH, temperature, and wood moisture content readings every day. Move equipment toward any section that stays consistently wetter. Low spots, corners behind piers, and framing near exterior walls often dry more slowly than open areas.
Common Drying Mistakes
● Running a dehumidifier while standing water or an active leak is still present
● Trying to dry exposed soil indefinitely without a vapor barrier
● Running fans in a space with visible mold
● Removing equipment when surfaces only feel dry to the touch
● Laying a vapor barrier over trapped water or an active drainage path
How Long Does It Take to Dry Out a Crawl Space?
The clock starts after the source is stopped and standing water is pumped out, not from when the event began.
|
Crawl Space Condition |
General Expectation |
|
Light condensation or minor dampness |
Often improves within 1–2 days |
|
Small clean-water leak caught quickly |
Several days may be required |
|
Wet insulation and damp wood framing |
Commonly several days to a week |
|
Flooded crawl space or saturated soil |
A week or longer may be necessary |
|
Ongoing groundwater or drainage failure |
Will not dry fully until the source is corrected |
|
Hidden or dense structural materials |
Requires measurement and possibly specialized equipment |
Why "Dry to the Touch" Is Not Dry Enough
Wood absorbs water unevenly. The surface dries first while the interior stays wet. That interior moisture keeps migrating outward, sustaining elevated RH and conditions for mold and rot. Only a calibrated moisture meter tells you what's actually inside the material.
Why Equipment Runtime Is Not a Completion Test
Three days of runtime isn't proof the space is dry. The unit may have spent that time fighting ground evaporation or a source that wasn't fully closed. Completion requires measured results, not a timer.
How Do You Know When the Crawl Space Is Dry?

Drying Verification Checklist
● No standing water or active leaks
● No visible condensation on pipes, ducts, or structural surfaces
● All retained materials feel dry throughout, not just on the surface
● RH has held stable below 60% across multiple readings
● Wood moisture matches an unaffected comparison area in the same structure
● No isolated wet zones remain in corners, behind piers, or near exterior walls
● RH does not spike after equipment is paused for several hours
Measure Relative Humidity
One reading below 60% RH isn't enough. Look for stability, RH holding consistently in the 45%–55% range across multiple readings over one to two days without climbing back. Set the humidistat at or below 50% during the active drying phase.
Measure Wood Moisture Content
Use a pin-type or pinless moisture meter directly on the framing. Find unaffected wood in the same structure and use it as your benchmark. When affected readings approach that number and stop declining between daily checks, the material is nearing equilibrium.
Watch for Moisture Rebound
Pause equipment for four to six hours, then re-read RH. A modest rise that stabilizes is normal. RH climbing to 70% or above in that window means stored moisture is still releasing, or the source isn't fully resolved. Resume equipment and investigate before removing anything.
What to Do After the Crawl Space Is Dry
Correct Exterior Drainage
Most crawl space water problems start outside. Extend downspouts at least four to six feet from the foundation, confirm yard grading slopes away from the house, and clear any French drains or drain tiles. Test the sump pump annually.
Repair or Install a Vapor Barrier
Exposed soil keeps releasing moisture vapor long after the event ends. A ground-level vapor barrier lets the dehumidifier run efficiently instead of fighting constant evaporation. If the liner was damaged or absent, fix it now.
If the liner is damaged or missing, repair it with properly overlapped and sealed material. A broader DIY crawl space waterproofing plan should also address drainage, ground preparation, seam sealing, and secure perimeter attachment.
Maintain Long-Term Humidity Control
Leave a hygrometer in place after equipment is removed. Check it seasonally, monthly in humid climates. If RH consistently climbs above 60% in warm months, a permanently installed crawl space dehumidifier with a humidistat and continuous drain is the right long-term fix.
Inspect for Mold and Material Damage
Revisit previously wet areas two to four weeks after drying. Look for fuzzy growth, soft wood, collapsed insulation, and persistent odors. Widespread mold on framing requires professional remediation.
When to Call a Water-Damage Professional
Call in a professional when:
● Sewage or contaminated water is involved
● Flooding is deep, widespread, or recurring
● Water is near electrical panels, combustion appliances, or gas lines
● Mold covers large areas of framing or insulation
● Subfloor or framing is soft, sagging, or visibly rotted
● Water can't be safely pumped out
● RH or wood moisture stops improving after several days of proper equipment operation
● Insurance documentation of drying completion is required
A restoration professional can provide moisture mapping, higher-capacity drying equipment, contamination controls, and documentation that may be difficult to reproduce during a DIY project.
Frequently Asked Questions
What is the fastest way to dry out a crawl space?
Stop the source, pump out all standing water, then run a dehumidifier with air movers on wet surfaces. Liquid extraction is far faster than evaporation. The dehumidifier comes on only after the floor is clear.
Can I use a dehumidifier to dry a wet crawl space?
Yes, after standing water is removed. A dehumidifier pulls moisture from air, not from the floor. Once wet surfaces have airflow directed at them, it becomes the most critical piece of equipment in the space.
Should I use fans to dry out a crawl space?
Fans speed up evaporation from wet surfaces, which helps the dehumidifier capture more. But fans don't remove moisture; always pair them with a dehumidifier. Never run fans where visible mold is present.
Can I put a vapor barrier over wet ground?
No. Plastic over wet or saturated soil traps moisture and lets damage continue out of sight. Wait until the ground is actively drying before laying or repairing a barrier.
How do I know when crawl space wood is dry?
Use a moisture meter, not touch. Compare readings to unaffected framing in the same structure. When the affected area approaches that benchmark and stops declining between daily checks, it's nearing equilibrium.
Don't Let Hidden Moisture Finish the Job!
Drying a crawl space means working through every step, not just the visible ones. Stop the source, extract the water, expose the framing, and confirm the result with humidity and moisture readings. The space smelling better or the floor looking clear doesn't mean the job is finished.
Moisture doesn't stop on its own, but the right equipment does. AlorAir's crawl space dehumidifiers are built for exactly this kind of continuous, unattended operation. Built-in condensate pumps, auto-restart, and humidistat control keep drying moving day and night until measurements confirm the structure is dry. Connect a drain line, set your target RH, and let it run.


