



Crawl space moisture can show up as damp soil, a musty smell, condensation on ductwork, sagging insulation, mold on framing, or a puddle after a storm. These symptoms often look similar from the outside, but they can come from different sources. Crawl space moisture doesn't always look like water, which is why it fools people into fixing the wrong thing. Rainwater, groundwater, soil vapor, humid air, and plumbing leaks each needs its own fix, and grabbing a dehumidifier before you know which one means paying twice. Here's what counts as crawl space moisture, what's causing yours, the warning signs, and the repair order that works.
What Is Crawl Space Moisture?
Crawl space moisture includes excess water vapor in the air, moisture held in soil or building materials, condensation on cold surfaces, and liquid water from leaks or intrusion. Zero puddles doesn't mean no problem.
Humidity, Condensation, and Water Are Different Problems
These five conditions are related but not interchangeable, and confusing them leads to the wrong fix:
-
High relative humidity (RH): Excess water vapor carried in the air itself, measured as a percentage of the maximum the air can hold at a given temperature.
-
Condensation: Water vapor turning to liquid when humid air contacts a surface colder than the air's dew point, commonly ductwork, cold water pipes, or foundation walls.
-
Ground vapor: Moisture evaporating continuously from exposed dirt or damp concrete, raising the humidity load even when no puddle is visible.
-
Water intrusion: Liquid water entering from rainwater, groundwater, or a plumbing leak.
-
Wood moisture content: Water absorbed into structural lumber itself, which is measured differently from air humidity and can stay elevated even after the air dries out.
These conditions frequently overlap, but not always in the same combination.
Is Some Crawl Space Moisture Normal?
RH rising in summer and dropping in winter is normal. Condensation on the same duct every August, or standing water, is not. Check the materials, not just the meter.
What Causes Moisture in a Crawl Space?
Most crawl space moisture problems stack two or three causes. Find the biggest one first.
Rainwater and Drainage Problems Around the Foundation
Water that isn't carried away from the house ends up finding its way into the crawl space. The usual culprits include:
-
Gutters that are clogged or overflowing
-
Downspouts that are too short or have come disconnected
-
Soil that slopes toward the foundation instead of away from it
-
Standing water pooling against the exterior wall
-
Cracks in the foundation itself
-
Gaps at the point where the foundation wall meets the floor
Groundwater and Pressure From a Rising Water Table
Saturated soil pushes water through cracks via hydrostatic pressure. That pressure can drive water through cracks, porous concrete, and floor joints even without any visible surface flooding.
This is a different problem from rainwater running off the roof. Groundwater intrusion tends to be recurring and seasonal, and a crawl space affected by it usually needs an interior or exterior drainage system, sometimes paired with a sump pump, rather than a vapor barrier or dehumidifier alone.
Water Vapor Rising From Exposed Soil
Bare dirt releases vapor constantly. That steady evaporation adds a constant humidity load to the space, which is one reason a dirt-floor crawl space often runs damper than a similar one with a sealed floor.
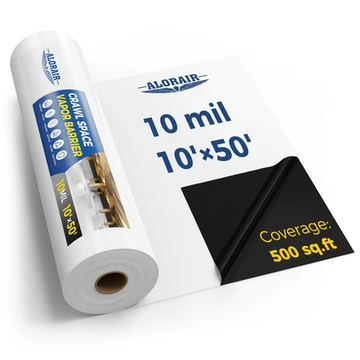
A ground vapor barrier addresses this pathway by covering the exposed soil and reducing evaporation into the crawl space. It does not drain standing water or correct groundwater that continues to collect beneath the liner, so those problems must be handled separately.
Warm, Humid Air Entering Through Vents and Gaps
Warm air enters, cools, and condenses on anything cold. This doesn't mean vents should automatically be sealed shut.
The right vent strategy depends on the local climate, how the crawl space is built, whether any combustion equipment (like a gas furnace or water heater) sits inside it, and what the applicable building code requires.
Leaks and Condensation From Plumbing and HVAC Equipment
A leaking pipe or clogged condensate line often creates a localized wet spot rather than evenly elevated humidity — a sign the problem is mechanical, not airborne. Nearby foundation cracks or localized water intrusion should also be ruled out before assuming it's plumbing or HVAC.
Gaps, Cracks and Unsealed Openings in the Foundation
Foundation cracks, poorly sealed access doors, unsealed pipe and wire penetrations, and gaps around framing all create additional entry points.
Depending on conditions, these openings can let in rainwater, humid outdoor air, or pests, sometimes more than one at the same opening.
What Are the Signs of Crawl Space Moisture?
Signs of moisture in a crawl space show up in two places: down there, or in the rooms above.
What to Look for Inside the Crawl Space
-
Standing water or muddy, saturated soil
-
Damp foundation walls
-
Water stains or efflorescence (the white, chalky mineral deposit left behind as water evaporates through concrete or masonry)
-
Condensation beaded on pipes or ductwork
-
Insulation that's wet, compressed, or sagging loose from the joists
-
Mold or other fungal growth on wood or insulation
-
Wood that looks darkened or feels soft to the touch
-
Rust on fasteners, pipes, or metal support posts
-
A persistent musty smell
-
More insect or pest activity than usual
One important caution: a stain can outlive the leak, so compare it with current moisture readings and check whether the material is still wet.
What You Might Notice in the Living Area Above
-
A musty smell on the first floor
-
Indoor humidity that runs higher than expected
-
Floors that feel uneven, cupped, or slightly sagging
-
Floors that feel unusually cold underfoot
-
Persistent dampness that doesn't track with a specific event
-
Mold appearing near floor penetrations or along the base of lower walls
-
An HVAC system that seems to be working harder than normal to control indoor humidity
How Much Crawl Space Moisture Is Too Much?
No single number covers every crawl space, but three benchmarks help.
Relative Humidity Thresholds
For many moisture-controlled crawl spaces, keeping RH below 60% and targeting roughly 45%–55% is a practical starting point. The EPA's general indoor guidance recommends keeping RH below 60% and, when possible, between 30% and 50%. Crawl space readings still need to be interpreted alongside temperature, season, and visible conditions. These seasonal RH targets for crawl spaces can help you decide whether a reading is a temporary fluctuation or a warning sign.
Wood Moisture Content
Wood moisture content must be measured directly from the lumber rather than inferred from air RH. Readings around or above 20% deserve investigation, especially if they persist, while higher moisture levels create increasingly favorable conditions for fungal decay. The exact risk depends on the wood, temperature, duration, and surrounding conditions, and a joist can remain wet even when the nearby air reads normally.
Visible Water or Wet Materials
Standing water or wet wood calls for action no matter what a nearby hygrometer says; RH is an average and misses a wet spot nearby.
Why Is Crawl Space Moisture a Problem?
Left alone, it doesn't stay contained to the crawl space.
-
Mold and Mildew: Sustained moisture feeds mold on wood and insulation, and the CDC notes damp conditions pull in pests too. Lower humidity helps slow new growth, but it won't remove what's already there.
-
Wood Rot and Structural Damage: Wood held above roughly 20%–30% moisture content invites decay fungi; soft wood and bouncy floors follow.
-
Wet and Damaged Insulation: Wet insulation sags, absorbs more moisture, and pulls loose, hiding mold and damage underneath.
-
Pest Activity: Damp crawl spaces attract termites, ants, roaches, and rodents. Cutting moisture helps, but won't clear an infestation already there.
-
Indoor Odors and Air Quality: Air moves between the crawl space and floor above through plumbing and wiring gaps, carrying musty smells upstairs.
-
Corrosion and Equipment Damage: Rust on fasteners and ductwork often trails humidity, though it's not the only cause.
How to Find the Source of Crawl Space Moisture
A short diagnostic pass beats guessing, and it doesn't take long.
Track Where and When the Moisture Shows Up
Notice if it shows up after rain, comes and goes with the season, or sits near plumbing and HVAC gear. Is it spread across the whole space or stuck in one corner? Does RH climb when it gets humid outside? These patterns are the fastest way to tell rainwater, groundwater, a leak, condensation, and soil vapor apart from each other.
Start With an Exterior Walkaround
Check the gutters and downspouts, the direction of the ground slope near the foundation, any water pooling by the house, foundation cracks, and the condition of vents and access doors. A lot of crawl space problems start outside, and you can often spot the cause in a few minutes without ever crawling under the house.

Check Plumbing and HVAC Components
Look over the pipes, drain lines, condensate lines, and ductwork for active dripping, mineral buildup, rust, or staining under one specific fixture. That kind of localized pattern almost always points to a mechanical source, not the air.
Take an Independent Humidity Reading
Use a standalone hygrometer instead of trusting the dehumidifier's own display — the built-in sensor mainly reflects conditions near the unit's air intake, and the two may not be calibrated the same way. Check more than one spot if the crawl space is large or split into sections, since humidity can vary a lot from one end to the other.
Check Wood Moisture in Multiple Locations
Test several framing members with a wood moisture meter, not just one. A high reading near an isolated leak doesn't mean the whole space is wet, and a dry reading elsewhere doesn't clear the rest.
Quick Reference
|
What You're Seeing |
Likely Cause |
First Move |
|
After heavy rain |
Drainage or foundation entry |
Gutters, grading, cracks |
|
Wet patch below plumbing |
Leak |
Fix the leak |
|
Damp soil, no puddles |
Soil vapor |
Vapor barrier |
|
Duct condensation, summer |
Humid air, cold surface |
Vents, duct insulation |
|
Standing water, after storms |
Groundwater or drainage failure |
Drainage, sump pump |
|
High RH, no visible water |
Soil vapor or air infiltration |
Barrier, vents, sealing |
How to Get Rid of Moisture in a Crawl Space
Work through these roughly in order; not every space needs every step.
Step 1: Stop Any Active Leaks First
Fix plumbing leaks, clogged HVAC condensate lines, and any active foundation entry points before installing humidity-control equipment. Drying out a space that's still being fed by a leak only buys a little time; the problem comes right back once the equipment falls behind.
Step 2: Improve Exterior Drainage
Clean and repair the gutters, extend downspouts well away from the foundation, fix the grade so water runs away from the house instead of toward it, and clear any spots where water pools against the wall. The 2021 IRC codes typically want 6 inches of fall per 10 feet.
Step 3: Remove Any Standing Water
Get bulk water out before worrying about air humidity; a dehumidifier isn't built to handle a puddle. Water that keeps coming back usually calls for an interior drain, a perimeter system, or a sump pump; designing that kind of system is its own project, worth tackling on its own.
Step 4: Install or Repair a Ground Vapor Barrier
A continuous barrier laid over exposed soil cuts most of the evaporation coming from the ground. Overlap and seal the seams, seal around posts and utility lines, and extend the material partway up the foundation walls rather than stopping at the edge of the dirt floor. Proper crawl space vapor barrier installation matters more than most people expect, so plan the seams and penetrations before buying the material.

Step 5: Manage Unwanted Air Entry
Vents, access doors, and utility penetrations are where outside air gets in. How much to seal depends on climate, the crawl space's design, local code, and any gas equipment sitting down there.
Step 6: Consider Crawl Space Encapsulation
Encapsulation extends that barrier idea across the ground and the walls, cutting down on uncontrolled air movement too. It's more thorough than a floor liner alone, but it won't fix an active leak or unmanaged groundwater; sealing those problems behind a liner just hides them.
Step 7: Add a Crawl Space Dehumidifier for What's Left
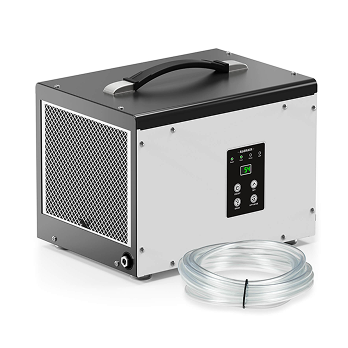
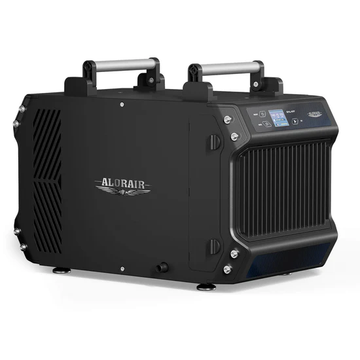
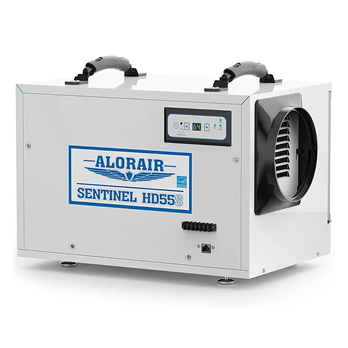
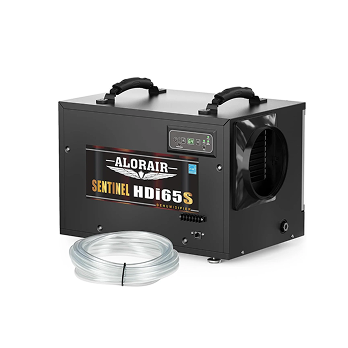
Once water intrusion and ground vapor are under control, a dehumidifier can help manage the remaining airborne moisture. When comparing crawl space dehumidifiers, consider AHAM-rated capacity, coverage area, low-temperature operation, automatic defrost, and drainage options.
Step 8: Dry or Replace What's Already Damaged
Lower humidity won't dry soaked insulation or wood alone; damaged materials need drying or replacement.
Which Crawl Space Moisture Solution Do You Need?
|
Source |
Main Fix |
Often Paired With |
|
Leaking pipe |
Repair the leak |
Dry soaked materials |
|
Roof runoff or poor grading |
Fix gutters and grading |
Foundation waterproofing |
|
Groundwater or standing water |
Drainage, maybe a sump pump |
Vapor barrier |
|
Soil vapor |
Ground vapor barrier |
Dehumidifier |
|
Humid outdoor air |
Air-sealing or vent strategy |
Dehumidifier |
|
Duct condensation |
Humidity control, duct insulation |
Air-sealing |
|
Lingering high RH |
Properly sized dehumidifier |
Better air circulation |
|
Several sources at once |
Combined plan |
Encapsulation, where it fits |
Do You Need a Vapor Barrier, Encapsulation, or a Dehumidifier?
Each does a different job.
-
What a Vapor Barrier Actually Does: Cuts vapor rising from bare soil. Won't touch humidity already in the air or drain liquid water.
-
What Encapsulation Adds: Extends coverage across ground and walls, limits outside air, still needs leaks and groundwater handled first.
-
What a Dehumidifier Actually Does: Pulls vapor from the air, holds humidity near a target, no effect on rainwater, groundwater, or a leak.
-
Why a Combination Is Often Necessary: Drainage, vapor control, air-sealing, and dehumidification each block a different pathway; more than one source usually means more than one fix. A unit can run effectively in a crawl space that isn't fully encapsulated yet, as long as the bigger problems are handled first.
Frequently Asked Questions
Is Some Moisture in a Crawl Space Normal?
Seasonal swings are, yes, humidity rises and falls with the weather. High RH that never drops, repeat condensation, damp materials, or standing water aren't normal and are worth looking into.
Should Crawl Space Vents Stay Open or Be Closed?
Depends on your climate, how the space is built, local code, and whether combustion equipment is down there. In humid climates, warm outdoor air entering a cooler crawl space can actually make condensation worse.
Can Crawl Space Moisture Lead to Mold?
Yes, sustained moisture creates the conditions mold needs. But lowering humidity only stops new growth; it doesn't clean up mold that's already there.
Can a Damp Crawl Space Affect the Rest of the House?
It can, through gaps in the floor system, plumbing chases, and wiring penetrations. That said, not every odor or humidity issue upstairs traces back to the crawl space; a bathroom fan or roof leak can cause the same thing.
How Can I Tell if Crawl Space Wood Is Too Wet?
Test several framing spots with a wood moisture meter, not just one, and weigh the readings against RH and how the material looks and feels. One reading in one spot doesn't tell you about the whole crawl space.
Conclusion
Crawl space moisture is rarely one problem. Stop the active water first, cut what's coming from the soil and air, then handle whatever humidity's left. Skip the diagnosis, and you'll pay for a fix aimed at the wrong thing.
Ready to handle the humidity piece? Once leaks, drainage, and vapor entry are under control, a properly sized unit does the rest by itself. The AlorAir Sentinel HD55P is rated to remove 55 pints per day under AHAM conditions and 120 pints per day at saturation, with manufacturer-listed coverage of up to 1,300 sq. ft. Its pump-equipped drainage system can move condensate without requiring a collection bucket. Confirm that its AHAM capacity, coverage, operating temperature, and pump setup match the conditions in your crawl space before selecting it.


