



You can pick great insulation and still put it in the wrong place. Install it on the wrong surface, or over a damp crawl space, and it can sag, trap moisture, and hide damage you needed to see. Knowing how to insulate crawl space surfaces starts with knowing which surface to insulate.
First, identify your crawl space configuration and the thermal boundary it calls for. Next, address any water or material damage. Then choose insulation and installation details that suit that assembly. A vented crawl space needs a different setup than a closed one. This guide covers how to insulate crawl space floors and walls, from picking the right surface and checking for moisture to choosing materials, R-values, and installation steps.
Should You Insulate the Crawl Space Floor or Walls?
Insulate the surface on your home’s thermal boundary, the line that slows heat flow between heated rooms and the outdoors. A vented crawl space acts like the outdoors, so that line runs along the floor above. A closed crawl space that’s part of the conditioned space moves the line to the perimeter walls, a design the U.S. Department of Energy (DOE) pairs with a ground cover and conditioning.
|
Crawl space configuration |
Likely insulation boundary |
What must be confirmed |
|
Vented, open to the outdoors |
Floor above the crawl space |
Dry joists and subfloor. Local floor R-value requirement. |
|
Closed, intentionally conditioned |
Perimeter walls, rim joists, vent openings, access door |
Local approval. Accepted moisture-control approach. Drainage plan. |
|
Unvented, not clearly conditioned |
Not determined yet |
How it was built. Vent status alone won’t tell you. |
Closed vents don’t make a crawl space conditioned, and a dehumidifier or fan won’t move the thermal boundary. Floor and wall insulation are usually alternatives, not a package deal.
In this guide, “floor insulation” means insulation beneath the occupied floor, against the subfloor. Don’t lay that insulation on the soil. It won’t do its job there, and it can stay damp. Insulating the crawl space ground requires a different approach.
Inspect the Crawl Space Before Adding Insulation
Inspect first. New insulation over water, damp framing, or damaged material traps moisture and hides the problem.
Pre-Installation Checklist
Grab a flashlight and check each item:
● Standing water or active leaks: puddles, wet soil, dripping pipes, water stains.
● Drainage problems: water marks on walls, or gutters and grading that send water toward the foundation.
● Damp or damaged framing: dark staining, softness, or visible mold on joists and subfloor.
● Wet, sagging, or contaminated insulation: damp, fallen, stained, or animal-fouled batts.
● Pest activity: droppings, nests, termite tubes, or chewed wood.
● Plumbing and ducts: leaks, torn or disconnected ducts, and pipes that need protection.
● Electrical hazards: exposed or damaged wiring and open junction boxes.
● Mechanical equipment: water heaters, furnaces, or other units that need clearance.
● Access limitations: tight openings or low spots that restrict installers and materials.
Record Findings and Decide What Stays
Photograph damage and note where moisture returns, such as after rain. Common crawl space moisture sources include drainage problems, leaking pipes, soil vapor, and humid air entering through vents. Each source needs its own fix.
Don’t cover damp material with new insulation. The U.S. Environmental Protection Agency (EPA) says water-damaged items should dry within 24 to 48 hours to prevent mold. Wet or sagging old insulation may not be reusable. If you find water damage, contamination, or structural problems, call a professional first.

Insulation, Air Sealing, and Vapor Control Do Different Jobs
No single measure does every job.
What Each Measure Does
● Insulation slows heat transfer.
● Air sealing stops air leaking through gaps and penetrations.
● Ground vapor control limits moisture rising from the soil.
● Drainage handles liquid water.
● Humidity management handles moisture in the air.
What Insulation Cannot Replace
Fibrous insulation doesn’t replace air sealing, because air moves through it. A ground vapor barrier doesn’t replace insulation, because it doesn’t control heat flow. Insulation doesn’t stop active water entry either, so fix the source first.
Wall assemblies also need a way to dry out, and vapor-retarder rules vary by climate and code edition.
Compare Crawl Space Insulation Materials
No material suits every crawl space, and none compensates for an unresolved water problem. Suitability depends on the assembly, the moisture conditions, and installation quality. This table covers three common options.
|
Material |
Potential application |
Installation requirements |
Important limitations |
|
Fiberglass or mineral wool batts |
Floor cavities above a vented crawl space |
Cut to joist width. Fit snugly against the subfloor, no gaps or compression. Support per product and code. |
Air passes through, so seal leaks separately. Moisture can make batts sag. |
|
Rigid foam boards |
Walls and rim areas in a closed crawl space |
Fasten to a sound wall per product instructions. Seal joints and edges. Add code-required covering. |
Permeability and R-value vary by board type. Combustible, so it needs protection. Fix damp walls first. |
|
Spray foam |
Walls and rim joists in a closed crawl space, where approved |
Usually professional install on a clean, dry, sound surface, within thickness limits. Follow fire-protection rules. |
Open- and closed-cell foam handle moisture differently. Cured foam can hide framing problems, so plan inspection access. |
How Foam Types Differ
The DOE rates open-cell at about 5 to 10 perms and closed-cell at under 1 perm at typical thicknesses, so closed-cell blocks far more vapor. (A perm measures vapor passing through a material.) It also warns against open-cell foam below grade, since it absorbs water and dries slowly.
What R-Value Does Crawl Space Insulation Need?
R-value measures resistance to heat flow, and no single number fits every crawl space. Your crawl space insulation R-value depends on your climate zone, the assembly, and your local energy code. DOE maps eight climate zones, but your building department sets the number.
What Sets Your Target
● Climate zone: colder climates generally need higher values.
● Floor versus wall assembly: each has its own requirement.
● Locally adopted requirements: your code edition controls.
● Product-rated performance: use the label’s R-value.
● Cavity versus continuous insulation: code tables often list both.
● Available space: cavity depth limits what fits without compression.
A Code Example: Floor and Wall R-Values Are Different
For Climate Zone 5, the 2021 IECC reference table lists R-30 for floors and options such as R-15 continuous insulation for crawl space walls. These are examples from a new-home code table, not a blanket requirement for every existing crawl space.
If you see “15ci or 19,” “ci” means continuous insulation. The numbers describe different installation arrangements, not two layers you automatically add together.
Thickness Is Not R-Value
Equal thickness doesn’t mean equal R-value. Closed-cell foam is roughly R-6 per inch and open-cell at about R-3.6. And don’t squash insulation to fit: the Insulation Institute, an industry group, notes that compressing fiberglass batts lowers their R-value. In a shallow cavity, pick a product rated for that depth.
How to Insulate the Floor Above a Vented Crawl Space
Floor insulation goes against the underside of the subfloor, after you handle moisture and seal air leaks. The vents stay put.
1. Address Moisture and Prepare the Floor Assembly
Check that joists, subfloor, and any material you’re keeping are dry and sound, and fix leaks and drainage first. If your code calls for ground moisture control, handle it as a separate job rather than a full encapsulation project.
2. Air-Seal Appropriate Gaps and Penetrations
Seal gaps between the house and the crawl space before you insulate: plumbing and wiring holes, the gaps around drainpipes, duct connections. Seal around the pipe, not the drain opening itself. Near flues and other heat-producing equipment, follow product instructions and local code to keep clearances and fire ratings.
3. Fit Insulation Against the Subfloor
Cut batts to the joist spacing, press them against the subfloor, and slit them around wiring and pipes instead of crushing them. Avoid gaps, sagging, and heavy compression. Follow the assembly design and the manufacturer’s instructions for facing and vapor-retarder details.
4. Support the Insulation and Check Continuity
Use support methods the product and local code approve. DOE’s crawlspace insulation fact sheet describes wire hangers or staves for batts, and netting or rigid board under truss floors. Check edges and obstructions for missed spots, and keep required vents and access openings clear.
How to Insulate Crawl Space Walls in a Closed System
Crawl space wall insulation is a coordinated design, not foam plus closed vents.
1. Confirm the Conversion and Moisture-Control Plan
Confirm the thermal boundary and local approval, and deal with liquid water before enclosing the space. Check whether fuel-burning equipment depends on crawl space air, whether flood vents must remain operational, and whether radon measures are needed.
Wall insulation is one part of a crawl space encapsulation system. Plan it with the sealed ground cover and moisture-control method, rather than treating the walls as a separate project.
2. Coordinate Ground Vapor Control and Air Sealing
The ground cover, seams, penetrations, and wall transitions must work with the insulation as one continuous enclosure. Follow your design for how the ground cover meets the walls.
3. Install the Selected Wall Insulation
Follow product requirements for surface condition, attachment, joints, and coverage. Pick materials that suit the wall’s drying potential, and don’t hide areas that need inspection.
4. Address Rim Joists and the Access Door
Rim joists and the access door are common weak spots. Carry thermal and air-sealing continuity across them with sealed rigid foam or approved spray foam. Insulate and weatherstrip the door, and keep it usable for service and inspection.
5. Provide the Required Moisture and Air-Management Strategy
Closing the vents isn’t the last step. Close them only after the space and its materials are dry, then add the moisture strategy your design and local code call for. Depending on the adopted code, options may include conditioned air, continuous exhaust with a makeup-air pathway, or dehumidification.
Check Termite Inspection and Foam Protection Requirements
Technical reminder: Before you finish, confirm these with your local code official:
● Preserve required termite inspection access.
● Verify restrictions on foam use.
● Verify thermal or ignition barrier requirements, where applicable.
● Follow product approvals and local requirements.
● Maintain equipment clearances.
Foam is combustible, so it typically needs a thermal or ignition barrier unless its approved installation allows exposure. The right protection depends on the location, use, and product.
Termite inspection access is a separate detail. The IRC restricts certain foam placements in areas rated “very heavy” for termite risk, while local rules may also require an exposed inspection strip. Requirements vary, so confirm the strip’s location and width, along with any foam placement restrictions, with local officials and a pest professional before covering the wall.
Inspect the Finished Work and Monitor Moisture
Verify the job by inspecting it, not by how the house feels. Check each item:
● The intended boundary is insulated continuously.
● Insulation is properly supported.
● Relevant air leaks are addressed.
● Ground vapor-control details match the design.
● Required inspection areas remain visible.
● Foam protection and equipment clearances are satisfied.
● Access remains usable.
● No active water problem has been concealed.
A warmer floor doesn’t prove the moisture is under control. Put an independent hygrometer mid-space and log readings for several days, including after rain, then again as seasons change. Compare the trend with the ideal crawl space humidity range, and check for recurring condensation or damp materials.
Air RH and wood moisture are different measurements. If framing was wet before the work, verify that it has dried with a moisture meter rather than relying on the room reading alone.
FAQs
Should I insulate crawl space walls or the floor above?
Insulate the surface on your home’s thermal boundary. A vented crawl space generally calls for floor insulation above it, and a closed crawl space that’s part of the conditioned space generally calls for wall insulation. Vent status alone doesn’t decide it, and insulating both isn’t the default.
Can I insulate a crawl space without encapsulating it?
Yes, if the crawl space stays vented. You can insulate the floor without sealing the walls or closing the vents. Moisture control is still a separate job: drainage, leaks, and ground moisture need attention.
Can I install new insulation over wet or sagging insulation?
No. Find and fix the moisture source first, then assess the old material. The CDC advises drying water-damaged items within 24 to 48 hours and assuming mold may be growing if you can’t. Insulation that remains wet, contaminated, or unable to stay in place may need replacement rather than another layer over it.
What is the best insulation for a crawl space?
It depends on the assembly, moisture conditions, installation requirements, and local rules. Batts are common in floor cavities above vented crawl spaces, and rigid foam or approved spray foam on closed-system walls. No product is best everywhere, and none fixes an unresolved water problem.
Does an insulated crawl space need a dehumidifier?
Not automatically. Insulation slows heat but doesn’t remove moisture, so the answer depends on your system design, your local code’s options, and your humidity readings after the work. If those stay high, a dehumidifier made for crawl spaces may help.
Conclusion
Pick the boundary first. Fix the water. Match the material to the assembly. Then check your work with a flashlight and a hygrometer. That’s how to insulate a crawl space the right way.
Don’t Let Damp Air Undo Your New Insulation!
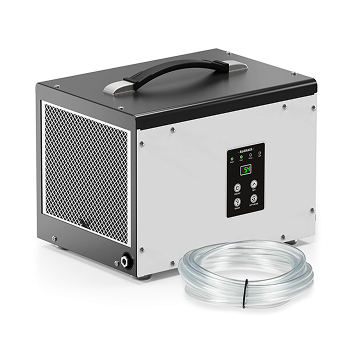
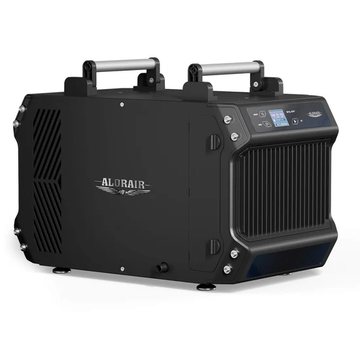
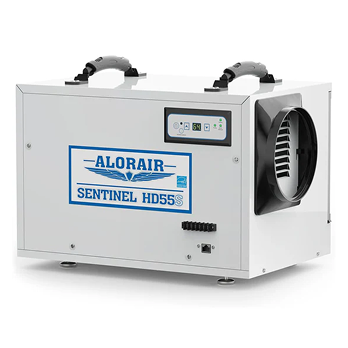
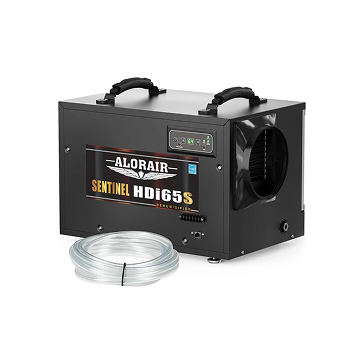
Insulation slows heat, not moisture. If readings stay high after the work, a dehumidifier sized for your crawl space can pick up where insulation stops. Browse AlorAir’s crawl space and basement dehumidifiers, match a model to your square footage and drain setup, and check the rating conditions before you buy.


