



Water in a crawl space rarely has one cause, and no single product fixes every case. Crawl space waterproofing describes a set of coordinated functions: diverting surface runoff, sealing entry points, collecting and removing groundwater, and controlling ground vapor. The right combination depends entirely on where moisture is entering. Most durable solutions also include ongoing humidity management, because liquid-water control alone rarely keeps airborne moisture in check.
A complete system works in this order:
1. Identify the water source
2. Direct rainwater away from the foundation
3. Repair leaks and seal foundation entries
4. Collect groundwater with perimeter drainage
5. Pump water out and away
6. Control soil vapor with a ground cover or encapsulation
7. Monitor RH (relative humidity) and wood moisture over time
What Is Crawl Space Waterproofing?
Waterproofing Is More Than a Vapor Barrier
A vapor barrier slows moisture evaporation from soil, but only once liquid water is already controlled. It won't drain standing water, stop seepage through cracks, or cut the humid air entering through foundation vents. If bulk water is still active, a ground cover traps it underneath rather than redirecting it.
The Three Types of Moisture a System Must Address

● Bulk water is liquid runoff, plumbing leaks, seepage, and rising groundwater. Address this first.
● Ground vapor evaporates from damp soil continuously. Bare dirt keeps RH elevated even without visible puddles.
● Airborne moisture enters through vents and gaps. Warm humid air cools as it enters the crawl space and condenses on framing and ductwork when it drops below the dew point, which is why duct condensation shows up even in dry weather.
Waterproofing vs. Moisture Control
Waterproofing targets liquid water specifically. Moisture control is broader: vapor barriers, air sealing, insulation, dehumidification. A lasting fix needs both.
System-Function Table
|
Function |
Problem Targeted |
Problem Targeted |
|
Water diversion |
Roof runoff near the foundation |
Gutters, downspouts, grading |
|
Water exclusion |
Runoff through wall cracks |
Foundation repair, hydraulic cement |
|
Water collection |
Groundwater and perimeter seepage |
Perimeter drain, drain tile |
|
Water removal |
Liquid water from drainage |
Sump basin and pump |
|
Vapor control |
Soil evaporation |
Ground vapor barrier or liner |
|
Air control |
Humid outdoor air through vents |
Vent covers, penetration sealing |
|
Humidity management |
Residual airborne moisture |
Crawl space dehumidifier |
Where Is the Crawl Space Water Coming From?
Fix the right problem first. A sump pump won't solve a grading issue. A wall coating won't stop groundwater rising from below the footing.
|
What You Observe |
Most Likely Source |
Start Here |
|
Puddles after rain |
Surface runoff or poor drainage |
Gutters, downspouts, ground slope |
|
Water below a pipe |
Plumbing or condensate leak |
Pipe joints, condensate line |
|
Wet soil, no puddles |
Ground vapor or high water table |
Existing cover and soil condition |
|
Water at wall-floor joint |
Hydrostatic pressure |
Foundation perimeter drainage |
|
White deposits on walls |
Seepage through masonry |
Exterior wall, drainage on that side |
|
Sump basin filling fast |
Pump failure or blocked discharge |
Pump, float, discharge outlet |
|
Condensation on ducts |
High RH meeting cold surfaces |
RH level, insulation, air leaks |
|
Musty odor, no visible water |
Hidden moisture in framing or soil |
Wood moisture meter, insulation |
Inspect During or Immediately After Rain
Dry-weather inspection misses the patterns that matter. Seepage and runoff entry points disappear within hours. Walk the exterior perimeter during or right after rain and note where water first appears inside, at the wall, wall-floor joint, or a specific corner.
Distinguish a One-Time Leak From a Recurring Water Problem
A repaired plumbing leak is a different situation from recurring seepage. Once the pipe is fixed, the immediate task is drying the crawl space out, not installing drainage infrastructure. Recurring seepage that shows up after every heavy rain is a drainage problem and needs a permanent fix, not repeated cleanup.
Check More Than Relative Humidity
Pair RH readings with a wood moisture meter. Joists and sill plates at or above 19% moisture content face elevated decay risk. Also check for efflorescence on walls, active staining, sump cycling frequency, and compressed or sagging insulation.
The Main Types of Crawl Space Waterproofing
Exterior Water Management
Start outside. Clean gutters, extend downspouts at least 6 feet from the foundation wall, and correct soil that slopes toward the house. Enough when: water enters only during heavy rain near clear runoff paths. Not enough when: groundwater rises from below grade regardless of rainfall.
Foundation Cracks and Penetration Sealing
Hairline shrinkage cracks in poured concrete respond well to hydraulic cement or below-grade sealant. Any crack with offset edges, horizontal cracking in block walls, or signs of reopening needs a licensed professional before sealant goes anywhere near it.
Interior Perimeter Drainage
When groundwater seeps repeatedly through the wall-floor joint, a crawl space drainage system channels it to a sump basin. This manages water rather than blocking it, more durable against sustained hydrostatic pressure than wall coatings. Waterproofing a crawl space this way is especially practical where exterior excavation isn't cost-feasible.
Enough when: entry follows the perimeter reliably. Not enough when: water also rises through the floor itself.
Sump Basin and Sump Pump
A sump pump removes liquid water that drainage collects, and nothing else. It won't lower RH or stop seepage. Every reliable installation needs a check valve on the discharge line, a high-water alarm, and battery backup where storm outages are common.
Ground Vapor Barrier
For dirt crawl space waterproofing, a ground cover is almost always part of the solution, even when drainage is already working. Bare soil evaporates moisture continuously. Seams should overlap at least 12 inches and run up the foundation walls. Get liquid water under control first; a liner installed over active seepage pools it underneath rather than moving it out.
Crawl Space Encapsulation
Encapsulation extends vapor control up the walls, seals foundation vents, and limits humid outdoor air from entering and condensing on framing. It complements drainage; it does not replace it. If you're tackling this yourself, starting with inspection and drainage before the liner goes in is what separates a result that holds from one that fails the first wet season.
Dehumidification
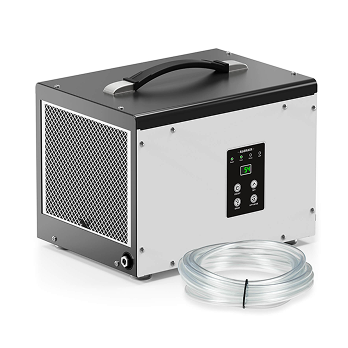
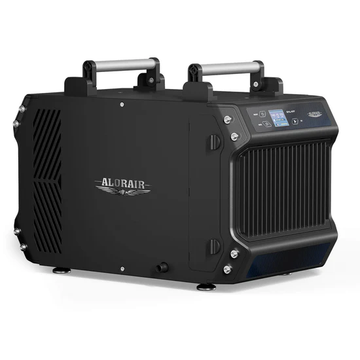
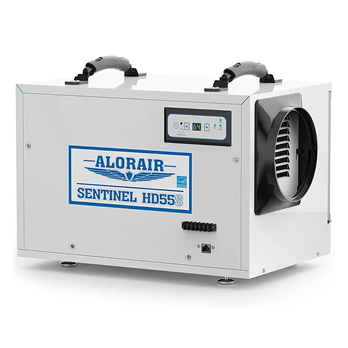
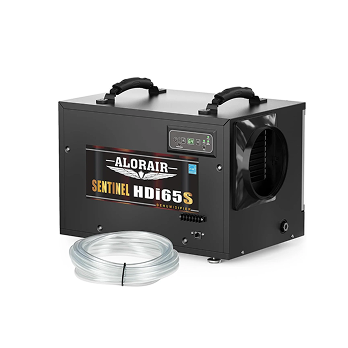
After drainage and vapor control, residual airborne moisture may still keep RH elevated. A crawl space dehumidifier handles that final layer; it can't pump out standing water or stop seepage, so it belongs last in the sequence, not first.
Capacity starts with square footage and actual moisture load. The Sentinel HD35P (35 PPD AHAM / 70 PPD saturation, built-in condensate pump) covers up to 1,000 sq.ft. The Galaxy 60P (60 PPD AHAM / 145 PPD saturation, built-in pump) reaches 1,800 sq.ft. without needing a floor drain.
For larger or wetter spaces, the ductable Sentinel HDi90 (90 PPD AHAM / 198 PPD saturation, up to 2,600 sq.ft.) distributes treated air across the full footprint. The models listed above include built-in condensate pumps and carry ETL or cETL safety listings. ENERGY STAR certification varies by model and should be confirmed on the individual product page.
The EPA recommends keeping RH below 60%; building science guidance generally targets 45–55% for structural protection.
Which Waterproofing Solution Matches Your Problem?
|
Crawl Space Condition |
Primary Solution |
Supporting Measures |
|
Water only during heavy rain |
Gutters, downspouts, grading |
Foundation sealing |
|
Repeated perimeter seepage |
Interior perimeter drain |
Properly sized sump pump |
|
Persistent high water table |
Full drainage and sump system |
Battery backup, high-water alarm |
|
Wet soil, no puddles |
Ground vapor barrier |
RH and wood moisture monitoring |
|
Ground vapor plus humid outdoor air |
Full encapsulation |
Crawl space dehumidifier |
|
Confirmed plumbing leak (repaired) |
Repair at the source |
Structural drying |
|
Condensation on ducts |
Duct insulation and air sealing |
Humidity management |
|
Existing system still failing |
Inspect drain, pump, liner, discharge |
Reassess water source |
|
Mold or rotted framing |
Remediation and structural repair |
Fix moisture source first |
When One Improvement May Be Enough
Extending a downspout that discharged against the footing can stop repetitive seepage on its own. Replacing a failed sump pump can restore a drainage system that was otherwise sound. Accurate diagnosis first: confirm the cause before adding more components.
When a Complete System Is More Practical
When groundwater rises seasonally, and soil stays damp regardless of weather, a layered approach works better than any single product. Waterproofing a crawl space in an older home often means combining perimeter drainage, a sump pump, a vapor barrier, and a dehumidifier, each handling one stage of the moisture pathway.
What Crawl Space Waterproofing Can and Cannot Fix
|
What It Can Do |
What It Cannot Do Alone |
|
Redirect surface runoff away from the foundation |
Fix structural movement or foundation settlement |
|
Collect and channel recurring groundwater |
Remove existing mold colonies from framing |
|
Discharge gathered water safely away from the house |
Restore rotted or load-compromised wood |
|
Reduce moisture evaporating from soil |
Correct sewage backup or contamination |
|
Create conditions unfavorable for new mold growth |
Guarantee a permanently maintenance-free space |
Mold remediation and structural repair come before waterproofing, not after it.
Why Waterproofing May Fail
● Wrong source diagnosed, the most common cause by far
● Downspouts discharge within 2–3 feet of the foundation
● Drain tile clogs with silt or root intrusion over time
● Sump pump undersized, or no check valve on the discharge line
● Discharge water returns toward the foundation
● Liner tears or lifted seams create vapor bypass
● Wall coatings applied over active hydrostatic seepage
● No dehumidifier after drainage was completed; the crawl space waterproofing system needs humidity control as its final layer, not an optional add-on
DIY vs. Professional Crawl Space Waterproofing
What a Capable DIYer Can Typically Handle
Grading corrections, gutter repairs, and downspout extensions cost less than interior drainage and should be done first regardless of what follows. Sealing stable cracks and penetrations with hydraulic cement and below-grade caulk requires no trade licensing.
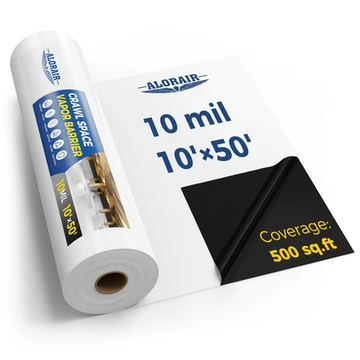
Dirt crawl space waterproofing that begins with vapor barrier installation is feasible once liquid water is controlled and soil is dry. Vapor barriers come in 6, 10, 12, and 14 mil across multiple panel sizes, sized to cover most layouts without excessive overlap waste.
Replacing a failed sump pump in an otherwise sound system is also within reach with basic tools.
When Professional Involvement Makes More Sense
Interior perimeter drain installation involves concrete sawcutting, excavation, and gravel backfill; done wrong, it fails under load. Structural cracks with signs of active movement need a licensed specialist before any sealant is applied.
Waterproofing a crawl space with recurring flooding, sewage contamination, or groundwater volume beyond a single pump's capacity needs engineering assessment, not just better materials.
How to Know the Waterproofing System Is Working
● No new standing water after heavy rain
● Water moves toward the drain and sump as designed
● Pump activates when the pit fills; shuts off cleanly after
● Discharge exits well away from the foundation
● No new stains or efflorescence on walls after rain
● Liner lies flat, sealed, and intact at all seams
● No condensation on framing or ductwork
● RH stays consistently below 60% (target: 45–55%)
● Wood moisture trends toward 15% or below
● Musty odors don't return
Test the System After Heavy Rain
Rain activates every component at once: grading, foundation seal, drain tile, sump. Enter the space during or shortly after a significant event and confirm water is moving toward the collection point and out through discharge, not pooling on the liner.
Watch for Moisture Rebound
If RH climbs back after installation, look for missed vent seals, lifted liner seams, or framing releasing stored moisture slowly. Log RH and wood moisture weekly for the first month, then monthly.
Crawl Space Waterproofing Maintenance
● Gutters and downspouts: Clean at least twice a year; confirm extensions haven't shifted from their original position
● Grading: Re-inspect after landscaping work or soil settlement near the foundation
● Sump pump: Fill the pit manually each pre-season to test activation and clean shut-off
● Backup power and alarm: Replace batteries on schedule; test at the correct float level
● Discharge pipe: Clear seasonal debris and frost blockage before wet weather arrives
● Liner: Walk the full surface at every inspection; repair punctures promptly with compatible tape
● Post-storm check: Enter after major rain in the first year; twice yearly after that
● RH and wood moisture: Log monthly; a unit running nonstop that can't lower RH points to an active moisture source, not a unit problem
● Biological and pest signs: New mold spots or returning odors are system-gap indicators, not cosmetic issues
No waterproofed crawl space is permanently self-maintaining.
Frequently Asked Questions
What is crawl space waterproofing?
It combines water diversion, foundation sealing, perimeter drainage, sump removal, vapor control, vent sealing, and dehumidification. The specific components depend on which moisture sources are active and where they're entering.
How do I stop water from entering my crawl space after rain?
Start outside. Overflowing gutters, short downspouts, and soil sloping toward the house cause most rain-related entry. Extend downspout discharge at least 6 feet and grade the first 10 feet of soil away from the foundation. If water still enters, inspect the foundation wall for cracks and open penetrations. Waterproofing a crawl space against rain means working outside-in, surface drainage before any interior solution.
How do you waterproof a dirt crawl space?
Dirt crawl space waterproofing has a fixed sequence. Control liquid water first, repair leaks, fix grading, add perimeter drainage if groundwater enters at the footing. Once soil is consistently dry, lay a vapor barrier with seams overlapping 12 inches and run it up the foundation walls. Seal vents and all penetrations. Install a dehumidifier last for residual airborne humidity. Laying the liner before liquid water is resolved traps standing water beneath it.
Is crawl space encapsulation the same as waterproofing?
No. Encapsulation controls vapor and air. A complete crawl space waterproofing system manages liquid water, diverting runoff, collecting seepage, and discharging it away from the house. Both are usually necessary, and liquid water has to be under control before the encapsulation liner goes down.
Can a dehumidifier waterproof a crawl space?
No. A dehumidifier removes moisture from the air, it can't intercept runoff, collect seeping groundwater, or discharge standing water. Running one in a space with an active water source cycles the unit without fixing anything. It belongs at the end of the process, not the beginning.
Conclusion
Crawl space moisture control starts with diagnosis. Pick a solution before confirming the source, and you're likely spending on the wrong thing. Control liquid water first. Add vapor and air control second. Manage residual humidity last. That's how to waterproof a crawl space correctly: sequence each layer of a functioning crawl space drainage system in order, then maintain every component on a regular schedule.
Humidity control is the step most homeowners skip the longest. Once your drainage and vapor barrier are in place, a properly sized dehumidifier is what keeps conditions stable year-round. The AlorAir crawl space dehumidifier range runs from 70 to 235 PPD, with built-in pump options and Wi-Fi models that track RH remotely, so you can confirm the space is dry without crawling back under the house after every storm.


