



Discovering mold under your home is unsettling, but it doesn't always mean writing a five-figure check to a remediation company. With the right approach, proper equipment, and a fair amount of elbow grease, many homeowners can tackle small crawl space mold problems on their own. This guide walks you through every step, from inspection to long-term prevention, so you can make a confident decision about whether a DIY crawl space project is right for you.
Quick Answer: Can You Safely Remove Crawl Space Mold Yourself?
In some cases, yes. Homeowners may be able to clean up a moldy area smaller than about 10 square feet, provided there is no sewage contamination, major water damage, HVAC contamination, structural damage, or serious health concern. EPA mold cleanup guidance generally treats mold patches of about 10 square feet (roughly 3 ft × 3 ft) or smaller as manageable for a careful homeowner, though local guidance may vary. Mold removal requires fixing moisture sources and wearing protective gear before you touch a single joist.
However, professional mold removal is recommended for areas larger than 10 square feet, especially when you notice a strong musty smell inside your living space, sagging or soft floor joists, or standing water that keeps returning. Professional remediation is safest for widespread mold issues.
Here’s the basic sequence for DIY cleanup:
-
Inspect and measure the moldy area in square feet.
-
Fix the moisture source - leaking water lines, drainage problems, or high humidity.
-
Suit up with personal protective equipment (respirator, goggles, gloves, coveralls).
-
Kill mold and scrub it off wood, concrete, and other surfaces.
-
Dry the crawl space completely, disinfect the affected surfaces, and reduce the risk of regrowth by correcting drainage problems and controlling future moisture. Depending on the source and severity of the problem, long-term protection may require a dedicated crawl space dehumidifier, a ground vapor barrier, or full crawl space encapsulation.
The rest of this article walks through each step in detail so you can decide if a DIY approach fits your situation.
Understanding Crawl Space Mold and Why It's a Problem
Crawl space mold is fungal growth that colonizes wood, insulation, and masonry under a home. Mold thrives in dark, damp, poorly ventilated environments - conditions that describe most crawl spaces perfectly. Over time, mold can compromise a home's structural integrity by weakening the wood it feeds on.
Common locations where mold in a crawl space appears include:
-
The underside of subflooring and along floor joists
-
Foundation walls and concrete piers
-
HVAC ducts and insulation batts
-
Soil surfaces, especially over a dirt floor without a vapor barrier
Crawl space air doesn't stay put. Warm air rises through the house via a phenomenon called the "stack effect," carrying mold spores into bedrooms, kitchens, and living rooms above. This means a hidden mold problem directly impacts indoor air quality throughout the entire home.
Not every dark spot is active mold. Fuzzy, powdery, or slimy patches in white, green, black, or brown typically indicate active growth, while old, dry discoloration may just be staining. When in doubt, any visible mold signals an underlying moisture issue worth addressing before structural damage spreads.

Health Risks and Safety Concerns with Mold in Your Crawl Space
Mold spores can travel through the air and grow rapidly once they land on a damp surface. When those spores drift upward into your living space, the health risks become personal.
Common health concerns linked to mold exposure include:
-
Nasal congestion, coughing, and wheezing
-
Eye and skin irritation
-
Allergic reactions in sensitive individuals
-
Worsened asthma symptoms and other respiratory issues
-
Headaches or memory issues after prolonged exposure
The CDC notes that people with asthma, allergies, COPD, or weakened immune systems face heightened risk and should generally avoid working in moldy crawl spaces themselves. Respiratory issues can escalate quickly in confined spaces with heavy spore concentrations.
Disturbing existing mold during cleaning temporarily spikes airborne spore counts, which is why proper PPE and ventilation are non-negotiable for any mold remediation project. If you experience dizziness, chest tightness, or breathing difficulty when inspecting the crawl space, exit immediately, consult a doctor, and consider hiring a professional.
Why Crawl Spaces Become Mold Magnets
Most crawl spaces were built cheaply, with minimal thought given to moisture control. They naturally accumulate excess moisture and humidity levels that mold loves.
Mold needs three ingredients to grow:
-
Moisture - from soil evaporation, leaks, or condensation
-
Food - wood framing, dust, paper-faced insulation, or unsealed wood
-
Moderate temperature - roughly 60–90°F, typical under homes from April through October
Building choices that invite crawl space issues include open crawl space vents that admit humid outdoor air, bare soil without plastic sheeting, unsealed foundation walls, and uninsulated ducts that drip condensation. Humidity levels can rise from ground evaporation in crawl spaces, especially over exposed soil.
Regional factors matter too. In states like Tennessee, Alabama, Kentucky, and coastal areas of the Carolinas, outdoor air is often more humid than crawl space air, pushing dew points high enough to trigger condensation on cooler wood surfaces. Homes with low grading, poor drainage, or older construction methods that never anticipated modern moisture standards are especially vulnerable.
Common Causes and Early Warning Signs of Crawl Space Mold
Once you understand why crawl spaces are mold-prone, the next step is pinpointing the specific causes and warning signs in your own home.
Moisture sources to investigate:
-
Plumbing leaks can introduce significant water into crawl spaces - even a slow drip adds gallons over time
-
Disconnected or dripping HVAC system condensate drains
-
Groundwater seepage after heavy rains or seasonal flooding
-
Improper drainage can lead to water accumulation in crawl spaces
-
Missing or damaged vapor barriers over soil
Early visual signs:
-
Small circular or speckled patches on floor joists
-
White fuzz on beams or sill plates
-
Orange or green mold growth on insulation backing
-
Dark streaks on concrete piers or foundation walls
Sensory and comfort clues:
- A persistent musty smell near the floor registers
- Cold or clammy floors during the summer months
- Higher humidity on the first floor compared to the upper levels
- Leaking plumbing sounds or visible water stains on ceilings above the crawl space
During your initial inspection, take photos and roughly estimate the moldy area in square feet. This number determines whether a diy crawl space cleanup is appropriate or whether you need professional help.
DIY vs Professional Help: When You Should Not Do This Yourself
Some crawl space mold jobs are perfect for a handy homeowner with a free weekend. Others are genuinely dangerous and demand specialized equipment. Being honest about which category your situation falls into can save you money, time, and health complications.
Call a professional when you see:
-
Visible mold covering more than about 10–20 square feet
-
Widespread growth across multiple floor joists or the entire subfloor
-
Structural damage - sagging, rotting, or spongy wood
-
Standing water that won't drain or keeps returning
Red-flag situations that complicate DIY efforts:
-
Previous flooding or sewage backups
-
Suspected asbestos insulation on ducts or old pipes
-
Animal droppings or nests in the crawl space
-
Water intrusion from a high water table or chronic foundation seepage
Professionals bring tools most homeowners don't own: HEPA air scrubbers for filtering contaminated air, negative-pressure containment systems, commercial dehumidifiers, and sometimes soda or dry-ice blasting equipment. They also carry moisture meters and infrared cameras for finding hidden problems. Professional remediation costs typically range from $5,000 to $15,000 or more, depending on severity and location.
If you're on the fence, get a professional inspection and quote before deciding. It's a small investment that prevents costly mistakes.
Safety First: Essential Gear and Precautions for DIY Crawl Space Mold Removal
Crawl spaces are confined spaces - dark, dusty, and often hazardous. Safety planning is not optional when removing mold from these environments.
Required personal protective equipment:
-
Wear an N-95 respirator and safety goggles during mold removal (use a half-face respirator with P100 filters for areas approaching 10 sq ft). A basic face mask from the hardware store is not sufficient for mold work. Consider safety glasses as a backup if the goggles fog.
-
Nitrile or rubber gloves extending to the forearms
-
Disposable Tyvek coveralls with a hood
-
Knee pads for crawling across joists
Environmental precautions:
-
Isolate the crawl space to prevent mold spores from spreading into living areas - seal the access hatch opening with plastic sheeting and duct tape when not actively working
-
Set up a box fan exhausting air to the outside for ventilation
-
Keep children and pets away from the work area
-
Containment of the work area is important during mold removal tasks
Structural and electrical warnings:
-
Never work in standing water near electrical wiring
-
Avoid resting weight on weak or damaged floor joists
-
Bring a headlamp plus backup lighting - you need both hands free
Prepare heavy-duty trash bags and duct tape to bag contaminated materials immediately. This prevents tracking moldy dust back into your home when you exit.

Step‑by‑Step: How to Remove Mold from Crawl Space Surfaces
This is the core section for anyone learning how to remove mold from a crawl space yourself. These steps apply to small to moderate mold growth on wood framing and masonry.
Stage the work area:
-
Lay clean plastic sheeting at the entry point to create a clean zone
-
Gather tools: scrub brushes (soft and stiff), a pump sprayer or spray bottle, rags, buckets, and a HEPA shop vacuum if available
-
Remove clutter, loose debris, and any fallen insulation blocking access
Pre-mist to control spores:
Gently mist moldy areas with water or your cleaning solution before scrubbing. This keeps spores from becoming airborne, which is especially important on overhead surfaces like floor joists. Avoid soaking the wood - a light mist is enough.
Clean in order:
-
Spray affected wood with a mixture of vinegar and water for cleaning (or your chosen mold killer - see next section)
-
Allow 10–20 minutes of dwell time per product instructions
-
Scrub thoroughly with a brush - along the grain on wood, more aggressively on concrete
-
Use a HEPA vacuum to remove mold spores from surfaces after scrubbing
-
Wipe residues with clean rags, then bag rags immediately
Work pattern: Start at the farthest corner and move toward the access hatch so you aren't crawling over freshly cleaned areas. Simply spraying a product and walking away won't cut it - physical removal of dead mold and residue is essential. After removing mold, apply a mold inhibitor or preventative coating to discourage regrowth. Mold inhibitors prevent regrowth after removal when combined with proper moisture control.
Choosing Products That Actually Kill Mold (Not Just Bleach the Stain)
There's a meaningful difference between lightening a mold stain and actually eliminating the organism. Understanding this distinction saves you from repeating the entire job in six months.
Household options for minor spots:
-
White vinegar - undiluted in a spray bottle, vinegar penetrates porous surfaces like bare wood and kills many mold species at the root
-
Hydrogen peroxide (3%) - effective on lighter-colored and non-porous hard surfaces; let it fizz and sit for 10 minutes before wiping
-
Baking soda - mix with hot water into a paste for scrubbing surface mildew; works well as a deodorizer after primary cleaning
-
Boric acid - dissolved in water, it serves as both a cleaner and a mild preventative on wood
Why bleach is often a poor choice:
Avoid using bleach on wood during mold remediation as it is less effective. Bleach does not kill mold at the root in wood - it strips the surface color, giving the illusion of removal, but leaves moisture behind on porous material that can actually feed future mold growth.
Commercial products:
EPA-registered fungicides and mold removers are tested for effectiveness. Spraying Concrobium or similar commercial mold control products according to label directions provides a residual barrier. Some homeowners follow up with a preventative coating designed for crawl space wood.
No spray alone is enough. You still need physical scrubbing, HEPA vacuuming, and moisture control to achieve a truly mold free crawl space. Be cautious with any cleaning chemicals in poorly ventilated spaces - always ensure airflow.
Special Considerations for Wood Joists, Subfloors, and Concrete
Not all crawl space surfaces respond the same way to cleaning, so your technique needs to match the material.
Wood joists and subflooring:
Wood is porous, which means mold roots penetrate below the surface. Use vinegar-based cleaners or specialized wood mold removers with soft- to medium-stiff brushes. Always scrub with the grain to avoid gouging. For superficial surface mold on unsealed wood, light sanding with HEPA vacuuming is an option - but deep rot, crumbling fibers, or spongy wood should be evaluated by a structural professional before you proceed.
Concrete and masonry walls:
These are hard surfaces and far more durable. Use stronger liquid cleaners, EPA-registered fungicides, and stiff wire brushes. Concrete can handle aggressive scrubbing that would damage wood. Rinse surfaces and allow them to dry completely before applying any sealant.
Insulation:
Replace porous materials like insulation or carpet if they are heavily contaminated with mold. Fiberglass batts with moldy paper backing are nearly impossible to clean effectively. In most cases, it's cheaper and safer to bag and discard all the insulation that shows heavy growth, then install fresh material after the crawl space is dry. This applies to any soft, porous material you find under the house.
Drying the Crawl Space and Controlling Moisture After Cleanup
Removing all the mold is only half the job. If you don't address the root cause - moisture - you'll be right back where you started within a season. Humidity control is essential to prevent mold regrowth.
Monitor humidity:
Place an inexpensive digital hygrometer in the crawl space for several days. Maintain relative humidity below 60% in the crawl space to prevent mold growth. Readings consistently above 65% signal that your current setup cannot keep up.
Short-term drying methods:
-
Portable fans blowing toward the access opening
-
A temporary dehumidifier ducted or placed in the crawl space
-
Opening crawl space vents briefly during cool, dry weather - but never during muggy or stormy conditions, as this introduces more moisture
These are a temporary fix. Dry the crawl space completely to reduce the chances of mold return, but lasting results require permanent solutions.
Permanent moisture fixes:
-
Repair all plumbing leaks and leaking plumbing connections - even slow drips
-
Extend downspouts at least 6–10 feet from the foundation
-
Clear or add gutters so rainwater doesn't pool near foundation walls after heavy rains
-
Improve exterior grading so water slopes away from the house
-
Install a sump pump if groundwater seepage is recurring
-
Seal air leaks between the crawl space and living areas above
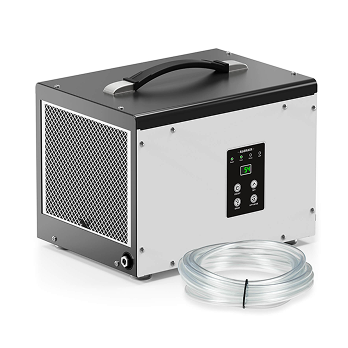
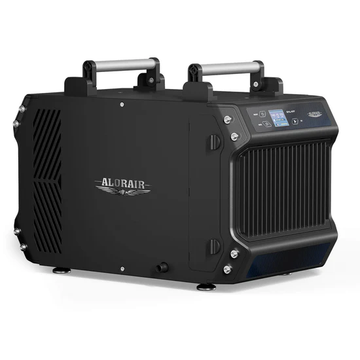
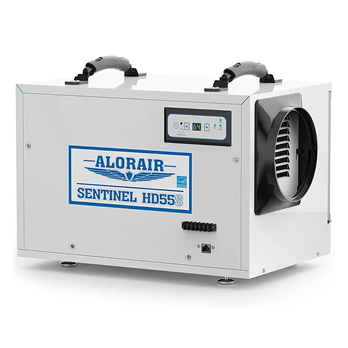
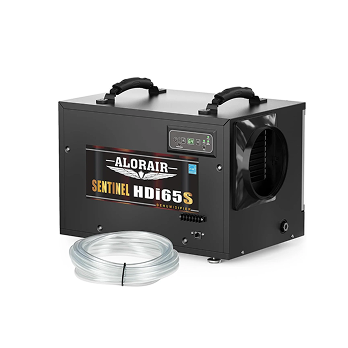
Once plumbing leaks, standing water, drainage problems, and other bulk-water sources have been corrected, use a dehumidifier designed for crawl spaces to maintain stable humidity over the long term. Capacity should be based on the crawl space area, moisture level, climate, sealing condition, ceiling height, and airflow—not simply the largest PPD number shown on a product page. Follow a practical process for sizing a dehumidifier for your crawl space before selecting a model. A correctly sized unit with continuous gravity drainage or a built-in pump can operate automatically without requiring you to empty a water tank every day.
Encapsulation and Other Long‑Term Strategies to Keep Crawl Spaces Mold Free
Crawl space encapsulation is the gold standard for long-term moisture control. It involves sealing the soil and walls with heavy vapor barriers, closing vents, and usually adding a dedicated dehumidifier and ventilation fans. Encapsulation prevents moisture intrusion when installed correctly.
Components of a typical encapsulated crawl space:
-
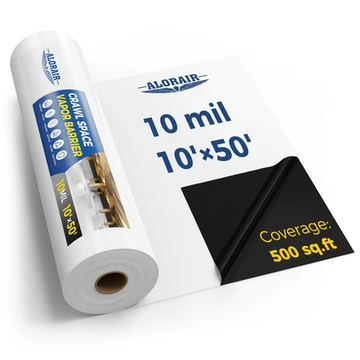
Install a heavy duty vapor barrier (10–20 mil reinforced polyethylene) over the entire floor. A vapor barrier must be at least 6 mil thick - Vapor-barrier thickness and installation requirements vary by local code and project design. Although 6-mil polyethylene may satisfy some minimum applications, thicker reinforced materials are often selected for better durability in accessible crawl spaces - but thicker is better for durability.
-
Sealed seams and piers with tape or mastic
-
Insulation on foundation walls rather than between joists
-
Airtight vent covers - sealing vents blocks humid outdoor air from entering
-
A properly sized dehumidifier with condensate drainage.
-
Ventilation fans to promote air circulation and prevent stagnant air build-up
Encapsulation alone does not kill existing mold. Encapsulation should follow proper mold removal for effectiveness. Think of it as the lock on the door after you've cleaned the house - sealing crawl spaces prevents outside air and water entry, and encapsulation keeps crawl spaces dry and mold free over the long haul.
Ambitious homeowners sometimes tackle partial DIY encapsulation - laying the vapor barrier over a dirt floor, taping seams, and sealing gaps. Full systems involving structural work, code compliance, and mechanical dehumidification often justify hiring a specialist. Typical encapsulation costs run $5,000–$15,000, with material costs for vapor barrier alone around $0.30–$0.70 per square foot.
When done correctly, encapsulation protects floor joists, improves first-floor comfort, and can reduce energy bills - making it a long-term investment, not just a one-time patch. These preventative measures pay for themselves over the life of the home.

Maintenance Checklist and When to Re‑Inspect Your Crawl Space
Even after a successful project, periodic checks are essential to prevent mold from quietly returning. A healthy crawl space requires ongoing attention, not a one-and-done effort.
Seasonal schedule:
-
Quick visual and smell check every spring and fall
-
Extra inspection after unusually heavy rain events, flooding, or any plumbing repair
What to review each time:
|
Item |
What to Look For |
|---|---|
|
Vapor barrier |
Rips, tears, standing water pooled on top |
|
Hygrometer readings |
Consistently under 60% RH |
|
Wood surfaces |
New discoloration, softness, or fuzzy growth |
|
Ductwork / HVAC system |
Condensation, disconnected lines, mold spots |
|
Plumbing |
Drips, corrosion, leaking water connections |
|
Sump pump (if installed) |
Functional, cycling properly, clear discharge line |
|
Grading and gutters |
Water flowing away from foundation, no pooling |
|
Keep a small notebook or digital log with dates, humidity numbers, and photos. This helps you spot trends over months and years instead of relying on memory. If mold in your crawl space starts reappearing despite moisture controls, pause DIY efforts and get a professional assessment - catching a recurring mold problem early is far cheaper than waiting until structural damage sets in. |
|
Conclusion: Putting It All Together for a Safer, Healthier Home
Small areas of crawl space mold can absolutely be handled by a well-prepared homeowner armed with proper equipment, the right cleaning chemicals, and realistic expectations. But the real solution to any mold problem isn't just scrubbing - it's addressing the moisture and high humidity that invited mold in the first place.
Here's the condensed recap:
-
Confirm the extent of mold and measure the affected area
-
Decide between DIY and professional help based on size and severity - don't skip eye protection or respiratory protection regardless
-
Protect your health with PPE rated for mold work - your respiratory system isn't worth the savings
-
Kill mold and physically remove it from wood and concrete with effective products
-
Implement lasting moisture control - drainage improvements, dehumidification with trusted brands like AlorAir, or full encapsulation
Investing time in your crawl space protects everything above it - floor joists, subfloors, the HVAC system, and the living spaces where your family sleeps and breathes. Fewer crawl space issues below means fewer health concerns above.
It's better to tackle a small mold problem this weekend than to wait until it grows into a major remediation project that costs ten times more. Grab a flashlight, check your crawl space, and take the first step toward a mold free home.


