


Taking on a crawl space encapsulation project yourself can be a smart move—if you plan it right. The right supplies, a clear work sequence, and safety precautions make a big difference. Whether you’re using a “DIY crawl space encapsulation kit” or assembling your own materials, this guide walks you through how to encapsulate a crawl space from prep to finish, plus key safety advice.
Why Encapsulate the Crawl Space?
Your home’s crawl space often sits over damp soil, is exposed to moisture, and can be a source of musty smells, mold, and elevated indoor humidity. Encapsulating means creating a sealed, dry “shell” beneath your home using vapor barriers, seals on walls/vents/piers, and proper drainage.
One professional guide says: “Crawl space encapsulation is the best way to repair your crawl space and properly address all the issues associated with moisture, standing water, mold, pests, and energy efficiency.”
When done right, encapsulation improves indoor air quality, reduces energy loss, and protects your structure and flooring. But it requires good planning, correct materials, and awareness of safety hazards.
Things You Need While Encapsulating Your Crawl Space
You should have the proper materials and tools before beginning your crawlspace encapsulation.
Important Tools
The tools you need are a utility Knife, a great deal of lighting: headlamps, flashlights, or utility lamps, work gloves, measuring tape, drill with masonry bits, protective eyewear, trash bags, disposable breathing mask, knee pads, marker, and rubber paint roller.
Necessary Materials
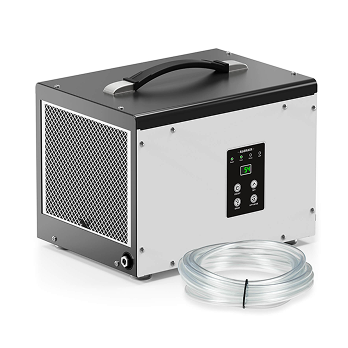
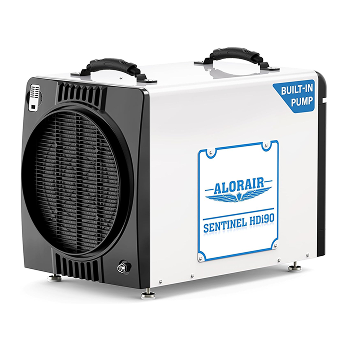
Regarding crawl space encapsulation, first and foremost you require a vapor barrier for crawlspace. For excellent humidity control and longevity, select a premium, thick vapor barrier (ideally 10-20 mil). Secondly, you should have a sealant tape. This is important for shielding the vapor barrier and closing gaps. Additionally, you need a dehumidifier. A dehumidifier for crawl space is a gateway to manage humidity levels after encapsulation. Another important material is insulation. For this choose fiberglass or foam insulation for extra thermal safety.
Make sure you opt for premium products, like the vapor barrier for crawl space and insulation, for a long-lasting solution. We have a variety of premium premium crawl space encapsulation solutions best for your needs.
Step-by-Step Encapsulation Guide (DIY)

Below is a clear walk-through of the process. Adjust for your space size, materials and local code.
Safety First & Initial Inspection
Before you start cutting and taping plastic, make sure the area is safe.
- Turn off any power to lighting/fans in the crawl space, or use battery-powered lights.
- If you see standing water, significant mold, or structural/termite damage: stop and consult a professional. Many guides emphasise that “If you have standing water… you’ll want to consult a professional before entering.”
- Use protective gear: gloves, knee pads, eye protection, mask/respirator (especially if you’ll touch insulation or disturbed materials).
- Clear away debris, old insulation, animal droppings, sharp objects. This is part of preparation.
Address Drainage & Ground Moisture
Even the best liner won’t work well if water keeps entering from the soil or sub-floor.
- Ensure proper outside grading, downspouts direct water away, no major leaks into the crawl space.
- If needed, install a sump pump or interior drain tile/trench system to divert bulk water. Some guides list “control ground water” as a key step.
- Choose high-quality vapor barrier material (thick, puncture-resistant). One resource suggests 10-20 mil thickness vs cheap 6 mil.
Seal Walls, Vents & Openings
Now begin sealing the crawl space from the outside/humid air.
- Roll vapor barrier up the foundation walls a prescribed height (e.g., up to top of wall or a few inches above grade) and attach securely.
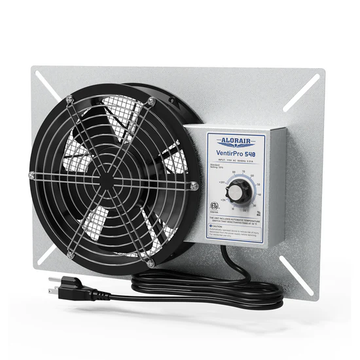
- Close off or seal exterior vents/openings so humid outdoor air cannot freely enter the space unless intentionally. One guide warns: “You can’t dehumidify a space that’s open to the outdoors.”
- Seal structural piers, columns, equipment bases (like HVAC/water heater) with barrier and tape around penetrations.
Install Vapor Barrier on Floor & Overlap Seams
Once walls and vertical surfaces are sealed, lay the barrier on the ground.
- Roll out the material across the exposed soil/floor area, ensuring there’s overlap where sheets meet. Many guides recommend overlapping seams and taping them.
- Extend the barrier up the walls and to the piers so you have continuous coverage from wall to floor. This “monolithic seal” approach yields best performance.
- Use heavy-duty seam tape or butyl tape at joints, corners, and around columns. Secure the material to walls/columns using termination bars, screws or adhesive depending on material.
Insulate & Air-Seal (if part of plan)
Depending on climate and goals, you may also insulate walls or rim joists, and air-seal further.
- Insulate foundation walls or rim joists using rigid foam or closed cell spray foam, according to local code. Many professionals emphasize that insulation plus vapor barrier yields the best result.
- Seal penetrations for plumbing, wiring, HVAC ducts, rim-joist gaps to avoid outside air infiltration.
- Leave a small inspection gap if required for termite/pest inspections (check your region’s regulation).
Insert Drainage / Pump & Install Monitoring Equipment
For ongoing performance you’ll want proper drainage and monitoring.
- If you installed a sump pump, make sure it’s routed correctly away from foundation, discharge is clear.
- If dehumidifier will be used, plan its location now and ensure drain hose or pump line is correctly set with slope or lift suited.
- Install a humidity gauge/monitor in the space so you can check conditions after encapsulation.
- Make sure the encapsulation material doesn’t block access to HVAC equipment, service doors, or utilities.
Final Cleanup & Verification
- Clean the space of tools, waste material, sharp edges.
- Verify all seams are taped, barriers secured, vents sealed.
- Check for any damage or penetration spots that need patching.
- Turn on monitoring device and mark baseline humidity/temperature readings. You might want to check after a few days of weather change to ensure the barrier is working.
Crawl Space Encapsulation Kit – “Super-Barrier Deluxe DIY Vet”

A kit composed of 20’×50’ 12-mil vapor barrier roll, seam tape, termination profiles, butyl tape, instruction DVD and support hotline. Meant for homeowners doing own install on ~1,000 sq ft crawl space.
Advantages: Provides all main materials in one box, decent thickness material (12 mil), good for DIY (saves sourcing individual items), lower cost than full professional wrap.
Disadvantages: Doesn’t include drainage work (you’ll still need to handle that), labor is fully DIY (time + physical effort), may not come with insulation or HVAC service which may be required depending on local code/conditions.
Safety Tips & Best Practices
- Always wear protective gear: mask (N95 or better), gloves, eye protection, kneepads.
- Ensure adequate ventilation in the crawl space while working.
- Use lighting that is safe in damp environments (battery/LED) and watch your footing—crawl spaces are low clearance with obstacles.
- Don’t ignore electrical or mechanical hazards: exposed wiring, old insulation, asbestos risk, pest droppings. If unsure consult professional.
- Ensure you have a way to safely exit the crawl space; back out rather than forward if movement is tight.
-
Check for radon, carbon-monoxide or other soil gases before sealing up your space, especially if you have a gas furnace/water-heater in the crawl space. One pro guide lists this as a required safety check.
Frequently Asked Questions
Can I encapsulate the crawl space fully by myself?
Yes—if you are comfortable working in tight quarters, have basic handyman skills, and the crawl space has no major issues (standing water, structural damage, severe mold). Guides suggest DIY is feasible. However, if you detect major problems you should involve a professional.
What thickness vapor barrier should I use?
Many recommend heavy duty material: at least 10-20 mil thickness rather than inexpensive 6 mil plastic. A guide states for durability and longevity go with thicker material.
Do I still need a dehumidifier after encapsulation?
Quite possibly yes. Encapsulation controls moisture entry, but a dehumidifier may be needed to manage air humidity, particularly in humid climates or where sealed spaces still trap moisture. One guide says an encapsulated crawlspace still may need a “proper humidity control device.”
What about vents—should I keep them open or sealed?
If you’re encapsulating, you typically seal or close external vents to reduce humid outdoor air infiltration. Ventilation may work in very dry climates but often defeats the purpose in humid zones.
Conclusion
Encapsulating your crawl space yourself can transform a damp, musty area into a resilient, dry support zone for your home. With careful planning, correct materials, a solid sequence and attention to safety, DIY is within reach.
Start by tackling drainage and mold issues, then seal walls, floors, piers, install the barrier, insulate if needed, and monitor the space afterwards. If your space is small to moderate in size and reasonably accessible, a DIY kit may serve you well. But if you encounter standing water, structural problems, or complex HVAC equipment, call in a pro.


