
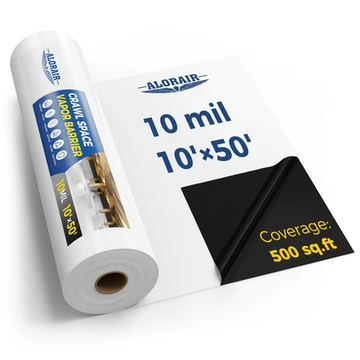



DIY crawl space encapsulation can be a manageable project when the space is dry, structurally sound, accessible, and free from major mold or pest problems. The job involves much more than laying plastic over the ground: you need to control liquid water, create a continuous vapor barrier, seal uncontrolled air openings, and decide how the finished space will manage humidity.
This guide walks you through the materials, preparation, and installation steps involved in encapsulating a crawl space yourself. It also explains when standing water, damaged framing, combustion equipment, radon concerns, or local code requirements make professional help the safer choice.
Quick Answer: You may be able to encapsulate a crawl space yourself if it has no active flooding, major mold contamination, structural damage, or unsafe electrical and combustion-equipment conditions. Fix water sources first, then install and seal the vapor barrier as one continuous system. Check local building and termite-inspection requirements before sealing vents or covering foundation walls.
What is Crawl Space Encapsulation?
Crawl space encapsulation creates a continuous moisture- and air-control boundary across the ground, foundation walls, piers, vents, access door, and penetrations. A ground vapor barrier is only one part of the system. Depending on the climate, construction, and local code, the project may also include drainage, air sealing, wall insulation, humidity monitoring, and mechanical dehumidification. Understanding how a crawl space encapsulation system works can help you plan each component before buying materials.
Why You Should Encapsulate Your Crawl Space
1. Prevent Mold and Mildew
Moisture in your crawl space can lead to mold and mildew, which can cause health problems like allergies and respiratory issues. Mold can also weaken the structural integrity of your home. Encapsulation helps keep moisture levels in check, preventing these issues before they start.
2. Improve Air Quality
A sealed crawl space reduces the number of allergens and pollutants entering your home. Since about 50% of the air you breathe in your home can rise up from your crawl space, keeping it clean and dry is crucial for maintaining good indoor air quality.
3. Save on Energy Bills
By preventing cold air from entering your home, crawl space encapsulation can reduce your heating costs. Insulation and moisture barriers keep your home’s temperature more stable, leading to lower energy consumption and cost savings of up to 20%.
4. Increase Home Value
A well-maintained crawl space can add to your home's overall value. Prospective buyers will appreciate the added benefits of a dry, energy-efficient crawl space, potentially increasing your home’s value by up to 10%.
Now, we’ll go over how to encapsulate a crawl space in more detail.
DIY Crawl Space Encapsulation: Step-by-Step Guide
1. Assess Your Crawl Space
Before starting, inspect the crawl space for standing water, plumbing leaks, foundation seepage, mold, pests, damaged wiring, wet insulation, and wood rot. Check whether any furnace, water heater, or boiler draws combustion air from the crawl space. Active flooding, widespread mold, sewage, structural damage, unsafe wiring, and combustion-air concerns should be evaluated before you seal the space. If water enters after rain, identify the source and plan the appropriate crawl space drainage or waterproofing solution first.
2. Gather Your Supplies
The exact materials depend on the crawl space and the system you are building, but a typical project may require:
- A code-compliant crawl space vapor barrier selected for the soil conditions and expected foot traffic
- Manufacturer-compatible seam tape, wall tape, sealant, and mechanical fasteners
- Materials for wrapping piers and sealing pipe or cable penetrations
- Rigid insulation or another approved below-grade insulation system, if required by the design and local code
- Materials for sealing foundation vents and the access door
- A tape measure, utility knife, drill, straightedge, and cleaning supplies
- Protective gloves, eye protection, knee pads, suitable clothing, and appropriate respiratory protection
- An independent hygrometer
- A crawl space dehumidifier or another approved humidity-control method, if measured conditions require one
Do not choose the liner by thickness alone. Thicker reinforced material usually offers better puncture resistance, but vapor permeance, durability, installation method, local code, and manufacturer instructions also matter.
If you prefer to purchase compatible materials together, compare the contents and coverage of available crawl space encapsulation kits before ordering.
3. Clean and Prepare the Area
Remove debris, damaged insulation, loose plastic, sharp objects, and anything that could puncture the new liner. If standing water is present, pumping it out is only the first step—repair the leak, drainage failure, grading problem, or groundwater entry that allowed the water to collect. Let wet framing and other materials dry before covering the area, and make sure the wall surfaces, seams, and fastening points are clean enough for the specified tapes and sealants to bond properly.
4. Install the Moisture Barrier
Measure the floor, walls, piers, and penetrations before cutting the vapor barrier. Install the wall sections and ground liner according to the barrier manufacturer’s instructions, overlapping adjoining sheets and sealing every seam with compatible vapor-barrier tape. Extend the liner around piers and seal carefully around pipes, columns, and other penetrations so the barrier remains continuous.
Fasten and seal the wall liner with materials approved for masonry and the selected membrane. Leave any inspection gap required by local building or termite-control rules, and do not cover drainage openings or create pockets that trap liquid water. The finished liner should direct incidental water toward the planned drainage system rather than holding it against the foundation.
5. Seal Vents, Doors and Air Leaks
In an unvented encapsulated design, foundation vents, access-door gaps, rim-joist leaks, and openings around pipes or cables must be addressed as part of one continuous air boundary. Do not seal the space blindly. First check local code, radon conditions, flood-zone requirements, and any fuel-burning equipment that may depend on crawl space air. Electrical, combustion-air, and radon work may require a qualified professional.
6. Insulate the Walls
Whether the foundation walls should be insulated—and which material should be used—depends on the climate zone, existing floor insulation, foundation type, termite-inspection requirements, and local code. Rigid foam is commonly used in some encapsulated crawl spaces, but it may require an approved ignition or thermal barrier. Confirm the assembly before removing existing floor insulation or covering foundation walls.
7. Seal the Crawl Space Door
A properly sealed crawl space door is crucial to keep out moisture and pests. Install a door seal to ensure there are no gaps or leaks. You can use weatherstripping or a custom-fit door to achieve an airtight seal.
8. Optional: Install a Dehumidifier
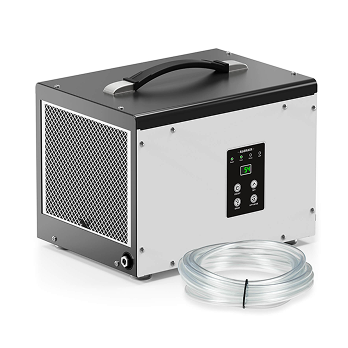
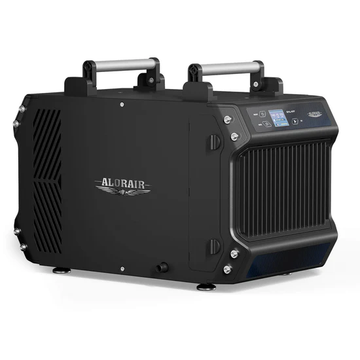
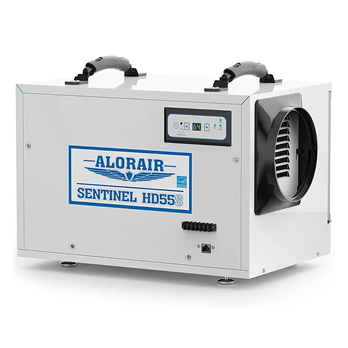
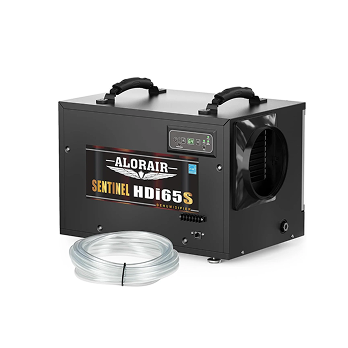
After sealing the ground and uncontrolled air openings, monitor the crawl space with an independent hygrometer. If relative humidity remains elevated, a properly sized crawl space dehumidifier can manage the residual moisture load. A dehumidifier can reduce the conditions that support mold growth, but it cannot repair leaks, remove existing mold, or compensate for an incomplete vapor barrier. Plan continuous drainage and keep the unit accessible for filter and drain maintenance.
9. Inspect and Maintain
Inspect the finished crawl space regularly and after major storms or plumbing problems. Look for loose seams, punctures, condensation, standing water, pest activity, drain blockages, and changes in relative humidity. Repair the barrier with compatible materials, clean the dehumidifier filter and drain system as directed, and investigate any sustained rise in humidity instead of simply lowering the humidistat setting. Use the site’s crawl space humidity guide to interpret readings rather than relying only on how the space feels.
Common DIY Crawl Space Encapsulation Mistakes
- Installing a liner before fixing standing water or foundation seepage
- Treating loose ground plastic as complete encapsulation
- Using ordinary household tape instead of membrane-compatible seam tape
- Leaving gaps around piers, pipes, drains, and wall edges
- Sealing vents without checking code, combustion equipment, radon, or flood requirements
- Covering mold, wet insulation, pests, or damaged wood
- Blocking drainage paths beneath the liner
- Installing a dehumidifier before reducing the moisture entering the space
- Failing to leave required termite-inspection access
- Assuming the project is finished without monitoring relative humidity
How to Monitor an Encapsulated Crawl Space
Improve visibility: Battery-operated or properly installed low-voltage lighting can make future inspections and maintenance easier.
Watch for pests: Check the access door, penetrations, and foundation perimeter for new pest activity. Treat an active infestation rather than relying only on repellents.
Track relative humidity: Place an independent hygrometer away from the dehumidifier outlet and check it regularly. Sustained readings near or above 60% RH can indicate an unresolved moisture source, air leak, drainage problem, or insufficient humidity control.
Check for water: Inspect the space after major storms and periodically check plumbing, condensate lines, drains, sump pumps, and foundation walls for leaks or standing water.
Encapsulation still requires maintenance. Humidity readings, drainage performance, liner condition, and sealed openings should be checked periodically to confirm that the system continues to work as intended.
Your Path to a Healthier Home
DIY crawl space encapsulation can work well when the space is accessible and the moisture problem has already been identified and corrected. Take the project one layer at a time: control liquid water, prepare the space, build a continuous vapor and air boundary, and then monitor humidity to confirm that the system is working.
Do not cover active mold, damaged framing, recurring groundwater, unsafe wiring, or unresolved combustion and radon concerns. In those situations, paying for the right inspection or repair before installing the liner can prevent a much more expensive problem later.


