





Spotted an unsightly black, green, or white patch on your bathroom ceiling? Don’t ignore it. Mold thrives where moisture lingers, and it can irritate your airways or trigger allergic reactions, especially if someone in your home has asthma or mold allergies.
For a small patch on a sound, washable surface, start by fixing the moisture source. Then clean off the growth and dry the ceiling thoroughly. A soft, sagging, or water-damaged ceiling needs a different approach.
This guide walks you through how to remove mold from a bathroom ceiling, choose a suitable cleaner, and keep it from coming back. We’ll also explain where an AlorAir HEPA air scrubber can support cleanup. Air filtration helps with airborne spores, but it can’t fix the moisture problem or remove mold from surfaces.
Why Does Mold Grow on Bathroom Ceilings?
Bathrooms are a breeding ground for mold due to their naturally humid environment. Showering, bathing, and hand washing increase humidity levels by releasing moisture into the air. When this moisture-laden air comes into contact with cooler surfaces like ceilings, walls, or pipes, it condenses, creating the perfect damp conditions for mold spores to germinate and thrive.
Poor ventilation makes the problem worse by letting shower moisture linger long enough for mold to take hold. Plumbing or roof leaks can also keep the ceiling wet, even when the bathroom is not in use. Recurring condensation on mirrors and windows is a sign that moisture is not clearing effectively.
If a ceiling patch gets wetter after rain or appears beneath an upstairs bathroom, check for a leak rather than assuming shower steam is the only cause. If you cannot locate the source, ask a plumber or roofer to investigate, depending on where the water appears to be coming from.
Bathroom mold can appear black, green, brown, white, or gray, and it may look powdery, fuzzy, or slimy. Color and texture alone cannot identify the species or tell you how serious the problem is. Black mold is not necessarily more hazardous than other colors, and lighter-colored growth is not automatically harmless.
You usually don’t need to identify the species before dealing with visible growth. Remove the mold promptly and fix the moisture source to help prevent it from returning.
Understanding the cause is the first step toward keeping mold from returning. Improve ventilation, repair leaks, and reduce lingering moisture rather than treating the stain alone.
Signs of Mold and Moisture Damage on Your Bathroom Ceiling
Spotting mold on your bathroom ceiling might be easier than you thought. Keep a close watch for discolored patches like black, brown, green, or even white. The texture can range from fuzzy to slimy, depending on the type of mold and how long it's been growing. Common hiding spots for mold on bathroom ceilings include corners, areas around light fixtures, and directly above the shower stall.
Besides visual clues, your nose can help you spot a problem. A persistent musty odor is a reason to check for damp materials or hidden mold, even if the ceiling looks clean.
Don’t ignore mold. Exposure can cause health problems, especially for people with allergies, asthma, or other respiratory conditions. Symptoms may include sneezing, coughing, wheezing, and skin irritation, and in some people the effects can be more serious. If you see mold or notice a musty smell, start dealing with it promptly.
Step-By-Step Guide to Removing Mold Safely and Effectively
Removing mold from your bathroom ceiling requires a careful approach to ensure your safety and the effectiveness of the cleaning process.
Before you begin, prioritize your safety by wearing gloves and a mask to avoid direct contact with chemicals and inhalation of mold spores.
DIY Cleaning: Choose the Right Cleaner
DIY cleaning can save money when you’re dealing with a small patch on a sound, washable ceiling. The key is to choose a method that removes the growth without damaging the finish or soaking the material.
Start with warm water and a mild detergent for surfaces that tolerate damp cleaning. Vinegar and commercial mold cleaners are alternatives where the material and product instructions allow them. Bleach-based products may suit some hard surfaces, but they are not a fix for mold growing inside damaged drywall.
Choose one cleaning method. Never mix bleach with vinegar, ammonia, or other cleaners, as this can release toxic fumes. Ventilate as directed, wear gloves and protective goggles, and follow the mold-particle protection guidance above. If the ceiling is soft, sagging, or deeply affected, get it assessed rather than trying stronger cleaners.
White Vinegar: Undiluted white vinegar is a common household option for small patches on vinegar-compatible surfaces. A commonly used method leaves it in contact for about an hour before wiping and removing residue. Test the finish first, and apply it with a cloth or sponge where practical to limit overhead spray. Do not soak drywall or use vinegar on acid-sensitive materials such as natural stone.
Baking Soda: A paste of baking soda and water can help scrub residue from durable, washable surfaces. Use a soft brush or sponge, then remove the paste and dry the area. Avoid abrasive scrubbing on delicate paint, and do not treat this method as a solution for mold growing inside damaged ceiling material.
Diluted Bleach: Bleach is an option for some compatible hard surfaces, but it is not the default choice for every ceiling. Follow the bleach label for dilution, ventilation, and contact time. CDC mold-cleanup guidance gives a maximum of 1 cup of bleach per gallon of water; this is a limit, not a requirement to use that strength. Avoid soaking painted drywall, and never mix bleach with other cleaners.
Warning: Never mix bleach with vinegar, ammonia, or other cleaning products. Do not use vinegar as a follow-up treatment over bleach residue. Choose one cleaning method and follow its instructions rather than layering different cleaners on the ceiling.
After cleaning, check that the visible mold growth has been removed and the ceiling has dried thoroughly. Some discoloration may remain, but a lingering musty smell or returning dampness needs further attention. If the surface starts peeling, softening, or breaking apart during cleaning, stop and check whether it needs repair or professional help. If mold returns over the following days or weeks, check again for leaks, trapped moisture, or inadequate ventilation rather than simply repeating the cleaning.
Commercial products:
There are many mold-specific household cleaners available at hardware and home improvement stores. These products are formulated to kill mold and may also contain ingredients that help prevent future mold growth. Choose a cleaner specifically designed for mold and follow the manufacturer's instructions.
How to Remove Mold From a Bathroom Ceiling: Step by Step
Step 1: Fix the moisture source. Repair an active leak before cleaning, and check that shower moisture has a way to leave the room. Confirm that the ceiling is sound enough for surface cleaning.
Step 2: Prepare the area. Remove toiletries, towels, and other movable items beneath and around the affected area. Protect the floor and nearby fixtures, and position a stable stepladder. Wear gloves, protective goggles, and a well-fitting N95 respirator. Follow the cleaner’s ventilation instructions too—an N95 does not protect against chemical gases or vapors.
Step 3: Apply one suitable cleaner. For detergent cleaning, use a damp cloth or sponge. For a commercial product, follow its application and contact-time instructions. Where the label allows, apply the cleaner to the cloth rather than spraying directly overhead.
Step 4: Remove the growth gently. Wipe a washable painted surface with a soft cloth or sponge without soaking the ceiling. Use a soft brush on durable tile or grout where needed. Stop if the finish lifts or the material begins to break apart.
Step 5: Remove residue and dry. Remove cleaning residue as directed, using a clean damp cloth where appropriate rather than pouring water over the ceiling. Once the mold growth has been removed, ventilation, a fan, or a dehumidifier can help finish drying. Do not aim a fan at untreated mold, and keep electrical equipment away from wet areas and cleaning spray.
Step 6: Check the result. Confirm that the surface is dry and the moisture source has been addressed. Recheck after normal bathroom use for returning condensation, musty odors, or mold growth.
For tiled ceilings, mold often collects in grout lines, corners, and edges. Use the cleaner you chose above, making sure it is suitable for both the tile and grout. Where the product instructions allow, apply it to a cloth or soft brush rather than spraying overhead. Follow the required contact time without soaking damaged joints or letting cleaner drip onto your face.
Gently scrub the grout with a soft-bristled brush or an old toothbrush, paying particular attention to corners and edges. Rinse as the cleaner requires, then dry thoroughly. Cracked grout, failed sealant, loose tiles, or mold that keeps returning may mean moisture is getting behind the tile. Have the area checked before repeating the same cleaning treatment.
If mold is persistent or the infestation is large, consider using an AlorAir air scrubber HEPA with filtration to remove airborne spores. This can help prevent the spread of mold and make your cleaning efforts more effective.
If DIY methods prove insufficient or if you have concerns about potential health hazards, consult a professional mold remediation specialist.
Should You Repaint or Replace the Ceiling?
Repaint only after the mold has been removed, the ceiling has dried, and the moisture problem has been fixed. A bathroom-appropriate primer and mold-resistant paint can help protect a sound surface, but paint should not be used to cover active growth.
Some staining may remain after cleanup. That does not automatically mean you should keep scrubbing or add stronger chemicals. Soft, sagging, delaminated, or deeply mold-affected ceiling material may need replacement instead.
How to Prevent Mold on Bathroom Ceilings
Ventilation Is Key: Run a bathroom exhaust fan that vents outdoors during showers and baths, then leave it on for about 20–30 minutes afterward. If surfaces stay wet, check the fan’s airflow and exhaust route rather than relying on the timer alone. Without a fan, an open window can help when outdoor conditions allow, but recurring dampness may need a permanent ventilation upgrade.
Fix Leaks Promptly: Address any leaks in your plumbing or roof. A small drip can quickly create a damp environment perfect for mold growth.
Regular Cleaning: Start with a weekly bathroom-cleaning routine, focusing on shower surfaces, corners, and other areas that stay damp. Warm water and a mild detergent are a simple option for washable surfaces. Wipe away condensation when practical, hang wet towels so they can dry, and check the ceiling during your routine so you catch any new patch early. Clean more often if moisture or residue builds up quickly.
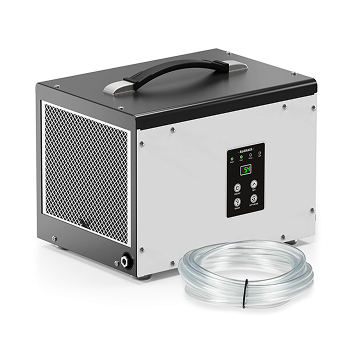
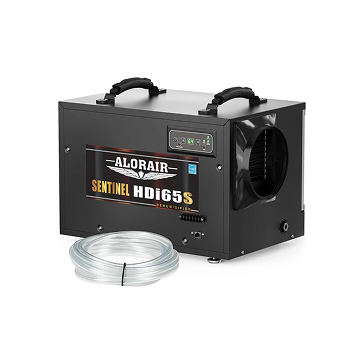
Dehumidifier: If your bathroom is particularly humid, consider using a dehumidifier. This device will remove excess moisture from the air, making it harder for mold to thrive. Keeping the room dry after cleaning is also important for preventing mold from returning. AlorAir offers a range of dehumidifiers designed for different room sizes and humidity levels.
Conclusion
Mold on your bathroom ceiling is more than an eyesore, but a small surface patch does not always mean a major renovation. Check the material, fix the moisture source, choose a suitable cleaner, and dry the ceiling thoroughly. Good ventilation and regular moisture checks help keep the problem from coming back.
If the ceiling is damaged or the mold keeps returning, bring in an experienced professional rather than repeating the same cleaning routine. For help choosing humidity-control or HEPA air-filtration equipment to support your plan, contact AlorAirCrawlspace. Start with the moisture problem, and you’ll give your cleanup a much better chance of lasting.


