



Did you know that improper moisture levels in your crawl space can lead to musty odors, rotting wood, and even mold growth that impacts your home's air quality? Installing a dehumidifier is an effective solution, and this guide will walk you through the process step-by-step.
Why You Need a Crawl Space Dehumidifier
Let's start with a little-known fact: the air you breathe in your home is directly impacted by the conditions in your crawl space. Excess moisture and humidity create the perfect breeding ground for mold, mildew, and other nasty stuff you don't want circulating through your living areas.
A quality crawl space dehumidifier helps regulate humidity levels between 30-50% - the ideal range for preventing moisture issues. Keeping your crawl space dry reduces musty odors, rot, insects, and the potential for structural damage over time.
Preparations Before Starting
Gather Your Tools:
1. Tape measure
2. Drill or screwdriver
3. Screws
4. Level
5. Utility knife (for measuring clearance and approximate fit)
6. Tubing for pump drainage (if needed)
7. Clamps (to secure tubing)
Prep the area:
1. Remove any debris, clutter, or standing water from the crawl space.
2. Fix any leaks from pipes or exterior drainage before installing.
3. If encapsulating, seal vents but leave enough clearance around the dehumidifier for good airflow.
Before installation, confirm that the unit is appropriately sized for the space. Square footage is important, but ceiling height, existing humidity, drainage conditions, and the severity of moisture intrusion also affect the required capacity. This guide to sizing a crawl space dehumidifier can help you estimate the appropriate performance range before purchasing a unit.
Step-by-Step Crawl Space Dehumidifier Installation
With your crawl space prepped and the right dehumidifier selected, you're ready for installation. Follow these steps carefully for a smooth, effective setup:
Step 1: Determine the Ideal Placement
For maximum effectiveness, your dehumidifier should be placed against the vapor barrier (thick plastic lining the ground) near the center of your crawl space. Avoid setting it directly on dirt and make sure there's enough clearance on all sides for airflow.
Step 2: Install the Drainage System
Most crawl space models use a gravity drain to automatically remove collected moisture. Drill a hole through the rim joist where you'll feed the drain hose to the exterior of your home, angling it slightly for proper drainage flow.
If using a built-in pump, you'll route the hose accordingly and may need a condensate pump depending on the distance.
Step 3: Plug It In and Make Adjustments
With the dehumidifier in place and drainage set up, it's time to plug it into a GFCI-protected outlet or install a dedicated circuit if needed. Power the unit on and use the display to set your target humidity level, typically between 30-50%. Allow a few hours for it to cycle and start dehumidifying the space.
Many models have additional settings like:
Fan Speed: Adjust based on moisture levels or noise preference.
Drain Pump Controls: Customize pump operation if present.
Timers: Set a schedule if you only need dehumidification periodically.
Humidistat: Automatically powers off when desired humidity is reached.
The features available will vary by model. When choosing the right crawl space dehumidifier, consider not only moisture-removal capacity but also drainage options, operating temperature, energy efficiency, noise level, filter access, and whether remote monitoring is available.
Pro Tips:
1. Replace filters regularly according to manufacturer recommendations.
2. Insulate any exposed ductwork to prevent condensation buildup.
3. Consider adding a dehumidifier drain air gap or condensation pump for easy drainage.
Step 4: Maintain and Monitor
Check on your dehumidifier every few months. Remove any built-up dust or debris from the coils and air filter. Inspect the drain line for clogs or leaks.
Use a humidity monitor to track moisture levels over time and adjust dehumidifier settings as needed throughout different seasons. Proper humidity control helps protect not just your crawl space, but the entire structure of your home.
With these steps complete, your crawl space dehumidifier is ready to begin controlling moisture levels! Be sure to monitor humidity readings periodically and adjust settings as needed.
Maintenance and Troubleshooting
To keep your dehumidifier running in top shape:
Filter Cleaning: Clean the air filter regularly, about every 6-12 months.
Drain Checkup: Inspect the drain line periodically and unclog if needed.
Descaling: Use manufacturer-recommended descaling methods to remove mineral buildup.
If issues arise, consult the manual for common diagnostic codes and troubleshooting tips before calling for service.
Encapsulation vs. Non-Encapsulation
One major decision when installing a dehumidifier is whether to fully encapsulate (seal off) your crawl space or leave it as a non-encapsulated, vented space. There are pros and cons to each approach:
Encapsulated Crawl Spaces
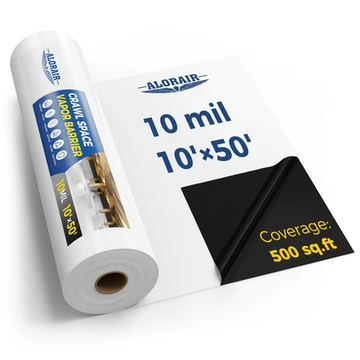
Encapsulation means using thick plastic sheeting to fully seal off the crawl space from any outside air and moisture intrusion. It creates a separate, isolated space.
Pros of Encapsulation:
1. Can achieve very low humidity levels more easily when paired with a dehumidifier
2. Better protection against outside air infiltration containing moisture
3. Prevents cold floors above the crawl space in winter
4. Increases energy efficiency of the home
Cons of Encapsulation:
1. Higher upfront installation costs for labor and materials
2. Requires proper vapor barrier sealing with no gaps
3. May require additional insulation and air sealing
4. Limits storage and access to the crawl space
Non-Encapsulated Crawl Spaces
The more traditional approach leaves crawl space vents open and doesn't fully seal from outside air movement.
Pros of Non-Encapsulation:
1. Lower upfront costs, easier for DIY installation
2. Allows more airflow and access to the space
3. Vents can provide supplemental air intake for HVAC systems
Cons of Non-Encapsulation:
1. Harder to control humidity levels with outside air entering
2. More potential for moisture infiltration from the exterior
3. Cold drafts can make it harder to condition the space
For both approaches, it's crucial to properly size and install a crawl space dehumidifier rated for the square footage. Sealing and insulating ductwork is also recommended.
Some contractors take a hybrid approach, utilizing sealed crawl space liners but leaving a few vents open. This balances air exchange with moisture control.
The best approach depends on the home’s age, construction type, climate, budget, and energy-efficiency goals. Encapsulation generally provides more stable humidity control, but it also increases upfront material and labor requirements. It’s also worth looking at the full project budget early on, since costs can vary widely depending on equipment and installation complexity. For a clearer breakdown of what to expect, including unit pricing, installation work, drainage setup, and long-term energy use, you can review typical crawl space dehumidifier costs. Many homeowners still choose encapsulation when conditions and budget allow, because it simplifies long-term moisture management and improves overall consistency.
Frequently Asked Questions
Can I install my own crawl space dehumidifier?
Yes—many homeowners do. If you can place the unit, run a drain line with a steady slope (or use a condensate pump), and plug into a grounded outlet, you can install a dehumidifier in a crawl space yourself. Hire a pro for any electrical work, complicated ducting, or if you’re unsure about drainage.
How long does it take to install a crawl space dehumidifier?
The actual dehumidifier installation typically takes 1-2 hours once your crawl space is prepared. However, if you're also encapsulating your crawl space with a vapor barrier, the complete project can take 4-8 hours depending on the size of your space and complexity of the layout.
What humidity level should I set my crawl space dehumidifier to?
The ideal crawl space humidity level is between 45-55% relative humidity, with 50% being optimal for most situations. Never allow humidity to exceed 60%, as this creates conditions favorable for mold growth.
Does a crawl space dehumidifier need a drain?
Yes. All units require a drainage path. You can choose either:
- Gravity drainage (requires lower drain point)
-
Built-in pump drainage (best for most crawl spaces)
Pump-equipped models offer more placement flexibility.
AlorAir Crawlspace Dehumidifiers
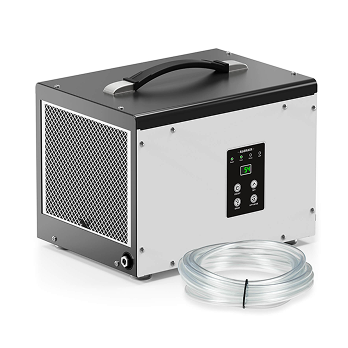
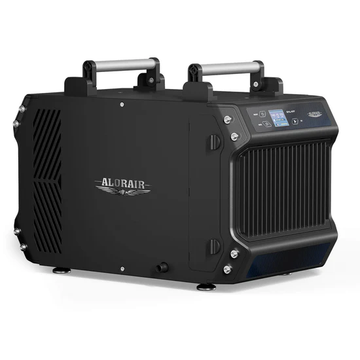
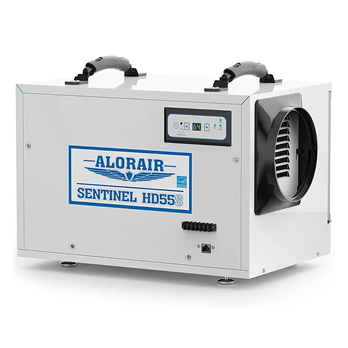
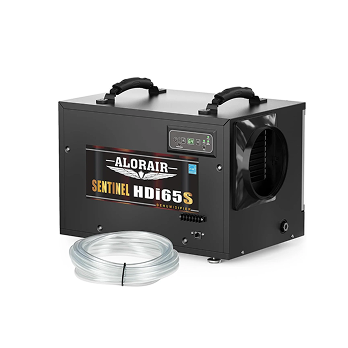
To maintain optimal moisture levels and protect your home from potential damage, consider investing in a high-quality crawl space dehumidifier from AlorAir Crawlspace. Our line of dehumidifiers are specifically designed for crawl spaces and basements, with models like the Sentinel HD55 and the Sentinel HD90 offering powerful moisture removal capabilities.
Visit aloraircrawlspace.com to explore our product offerings and find the perfect dehumidifier solution for your crawl space needs. With proper installation and maintenance, an AlorAir dehumidifier can provide years of reliable humidity control, safeguarding your home's structural integrity and indoor air quality.


